

Managing purchase receipts and work tickets efficiently is crucial for maintaining accurate records within Aspire’s Purchasing system. When you receive invoices from clients detailing location, property, and materials, the process of updating the Purchasing tab in Aspire becomes a streamlined task.
In this guide, we’ll walk you through the essential steps—from creating new purchase receipts based on client information to assigning work tickets and ensuring all data aligns with the corresponding invoice dates. By following these steps, you’ll be able to manage your purchase receipts with ease, ensuring your records remain accurate and up-to-date.
Steps to Manage a Purchase Receipt
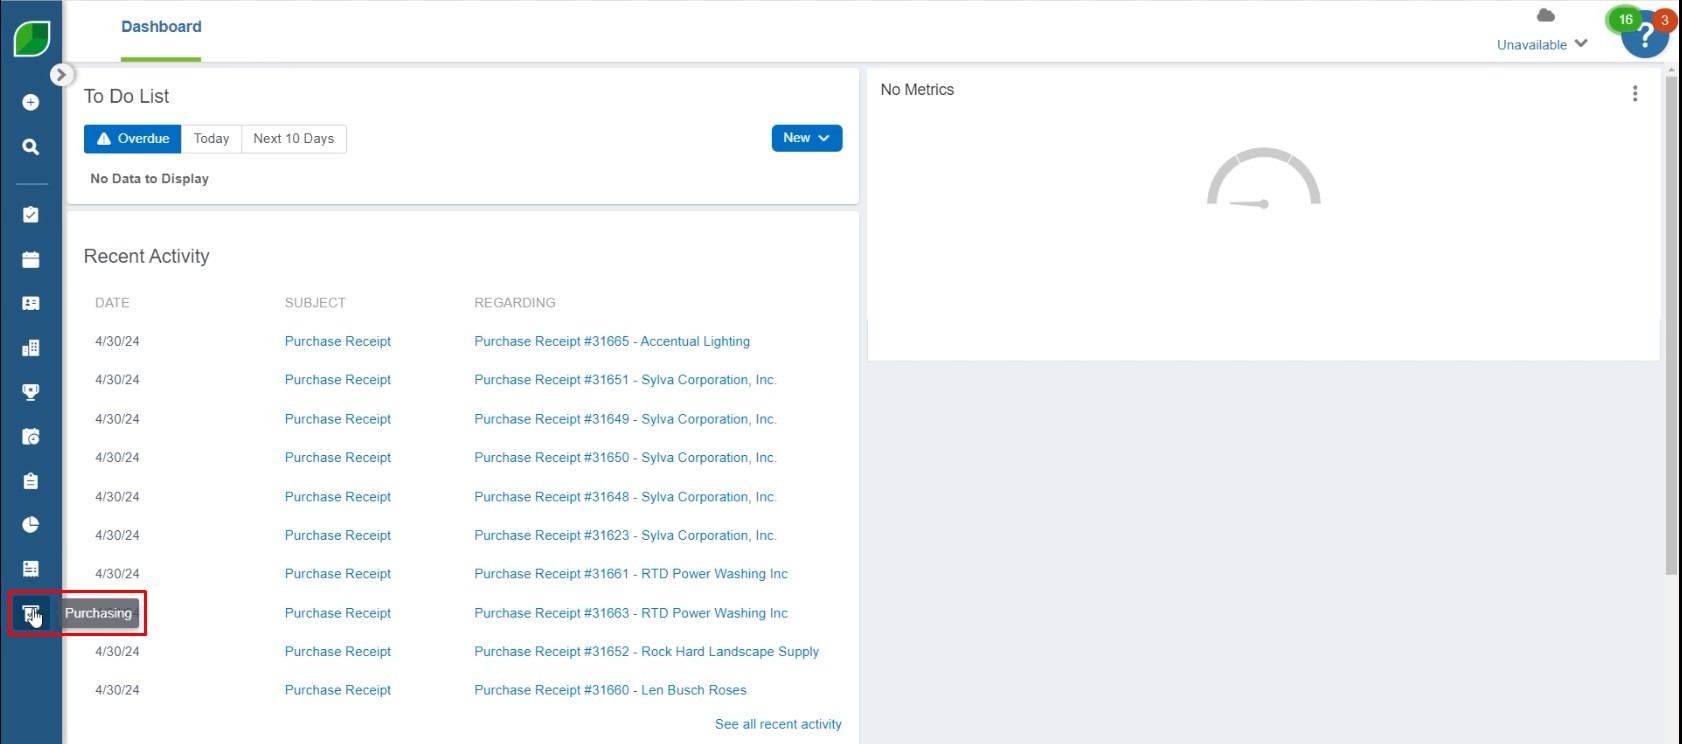
1. Click on ‘Purchasing’
- Begin by logging into your Aspire account.
- Navigate to the ‘Purchasing’ section from the dashboard.
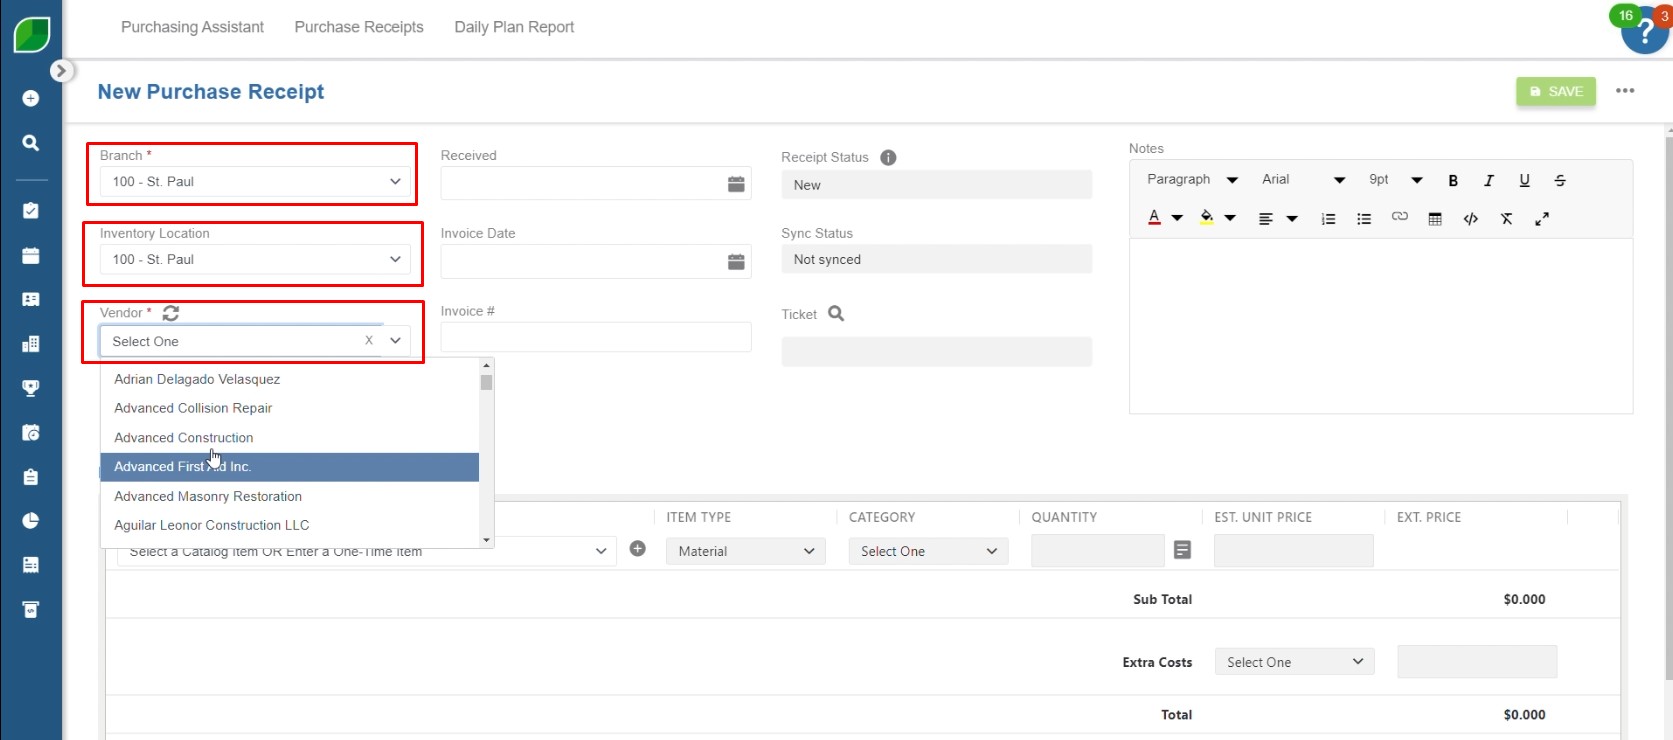
2. Select the ‘Branch’, ‘Inventory Location’, and ‘Vendor’
- Choose the appropriate branch from the dropdown menu.
- Select the correct inventory location and vendor for the purchase.
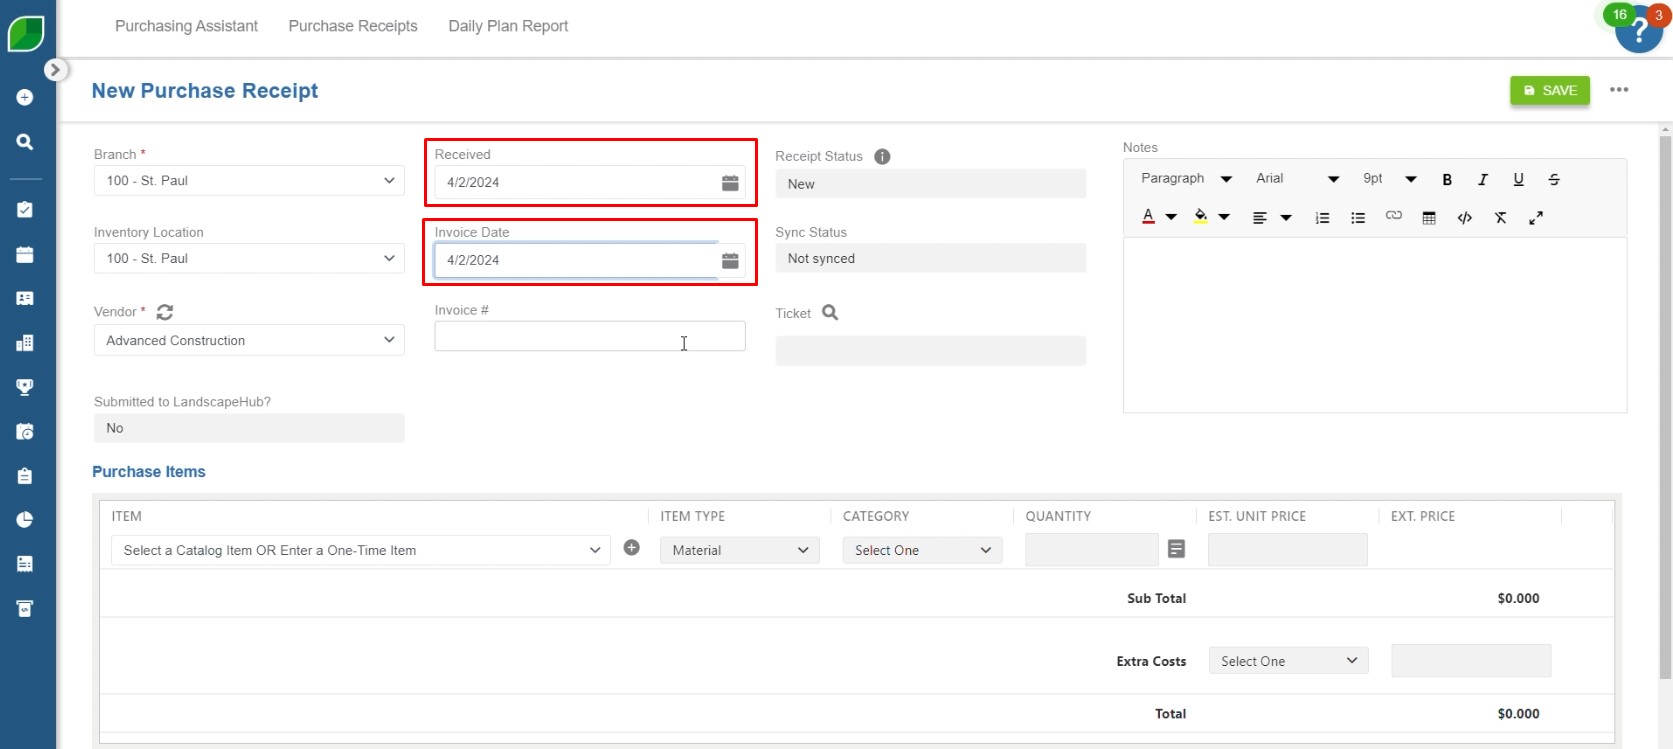
3. Select the receiving date on ‘Received’ and add the invoice date on ‘Invoice Date’
- Enter the date the items were received under the ‘Received’ field.
- Input the invoice date in the ‘Invoice Date’ field.
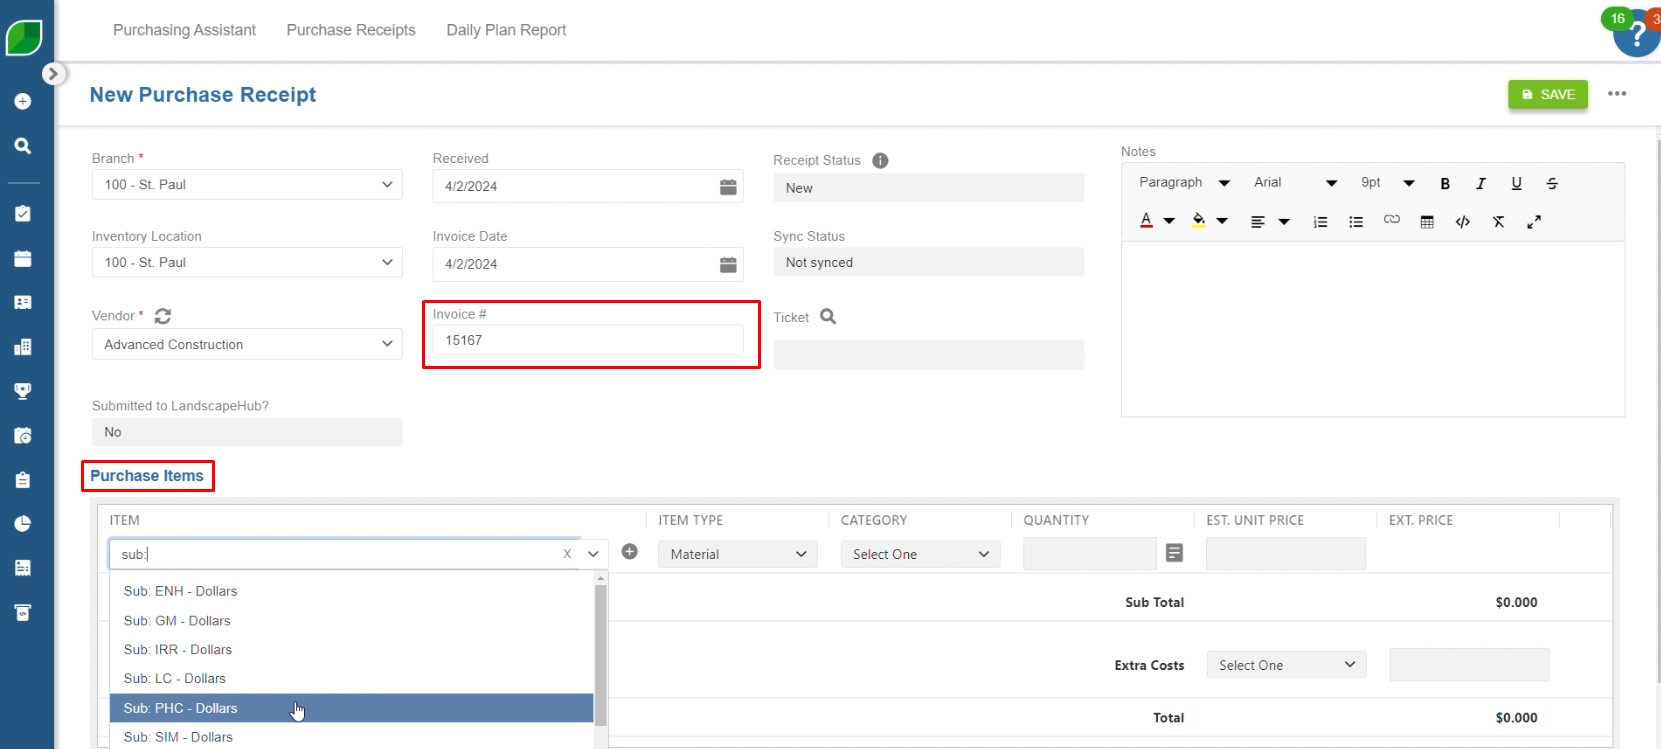
4. Entering Invoice and Item Details
- Add the Invoice Number: Enter the invoice number in the designated field.
- Go to ‘Purchase Items’: Navigate to the ‘Purchase Items’ section to start detailing the items received.
- Enter Item Details: Fill in the necessary details about the purchased items, including descriptions, quantities, and any other relevant information.
5. Click on ‘Quantities’
- Click on the ‘Quantities’ button to specify the quantity of each item.
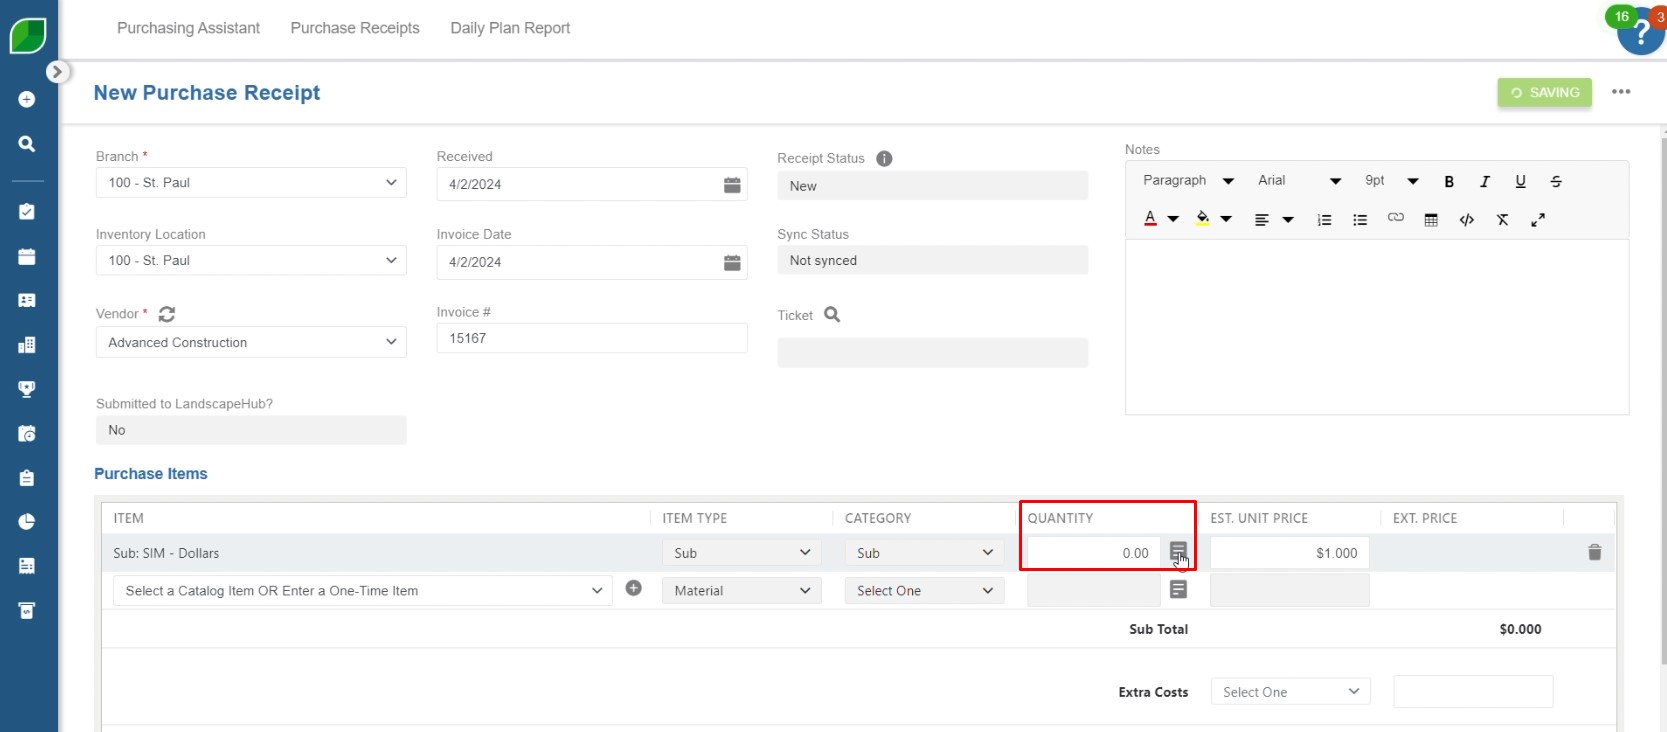
6. Hover over the settings icon near quantities in the ‘Purchase Allocation’ tab
- The ‘Purchase Allocation’ tab will appear.
- Hover your cursor over the settings icon next to the quantities and click on it.

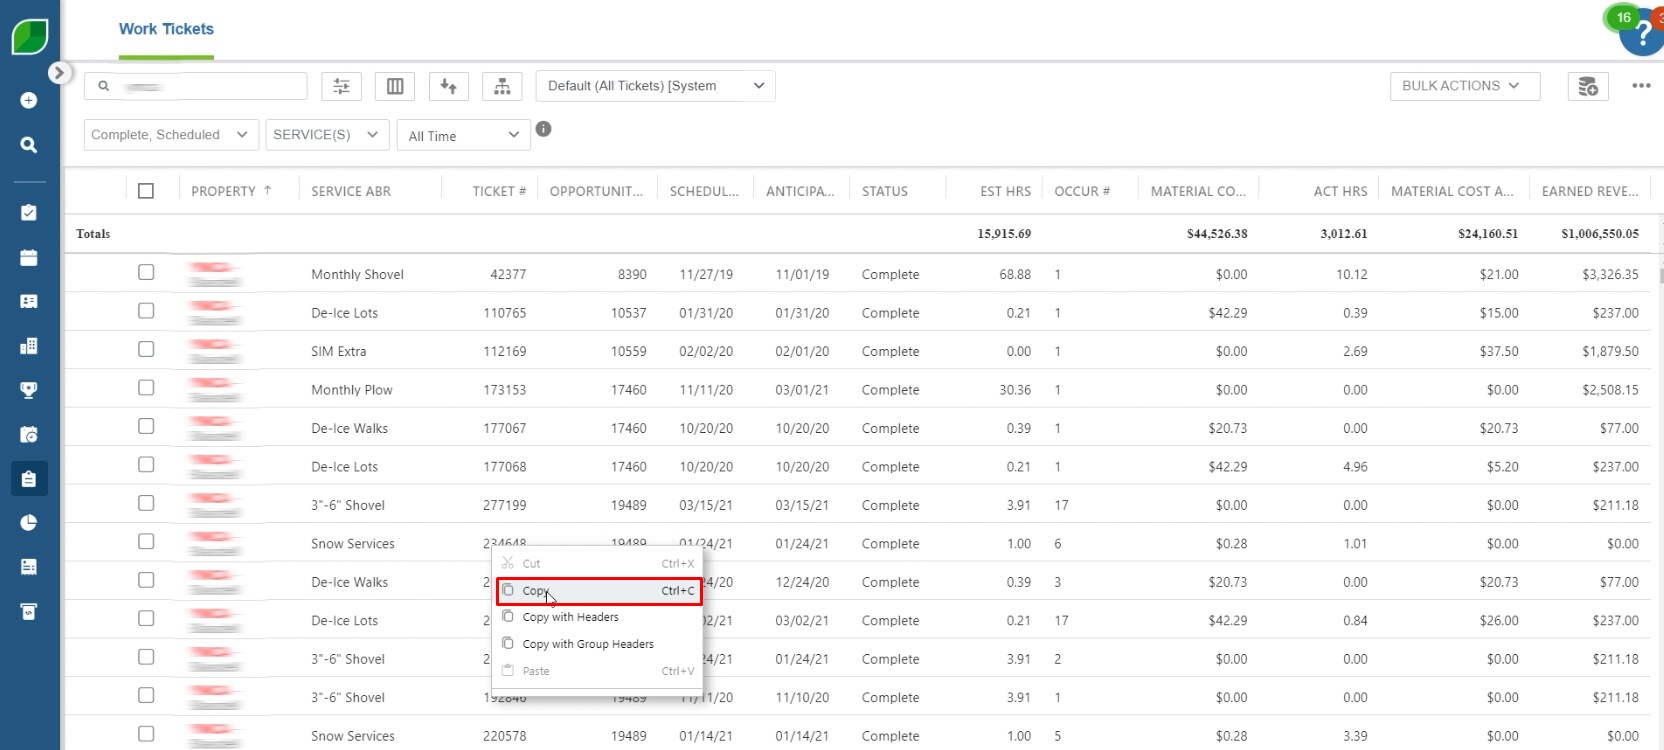
7. Copy the ‘Ticket’ number from the ‘Work Ticket’ page
- A ‘Work Ticket’ page will open.
- Copy the ticket number displayed on this page.
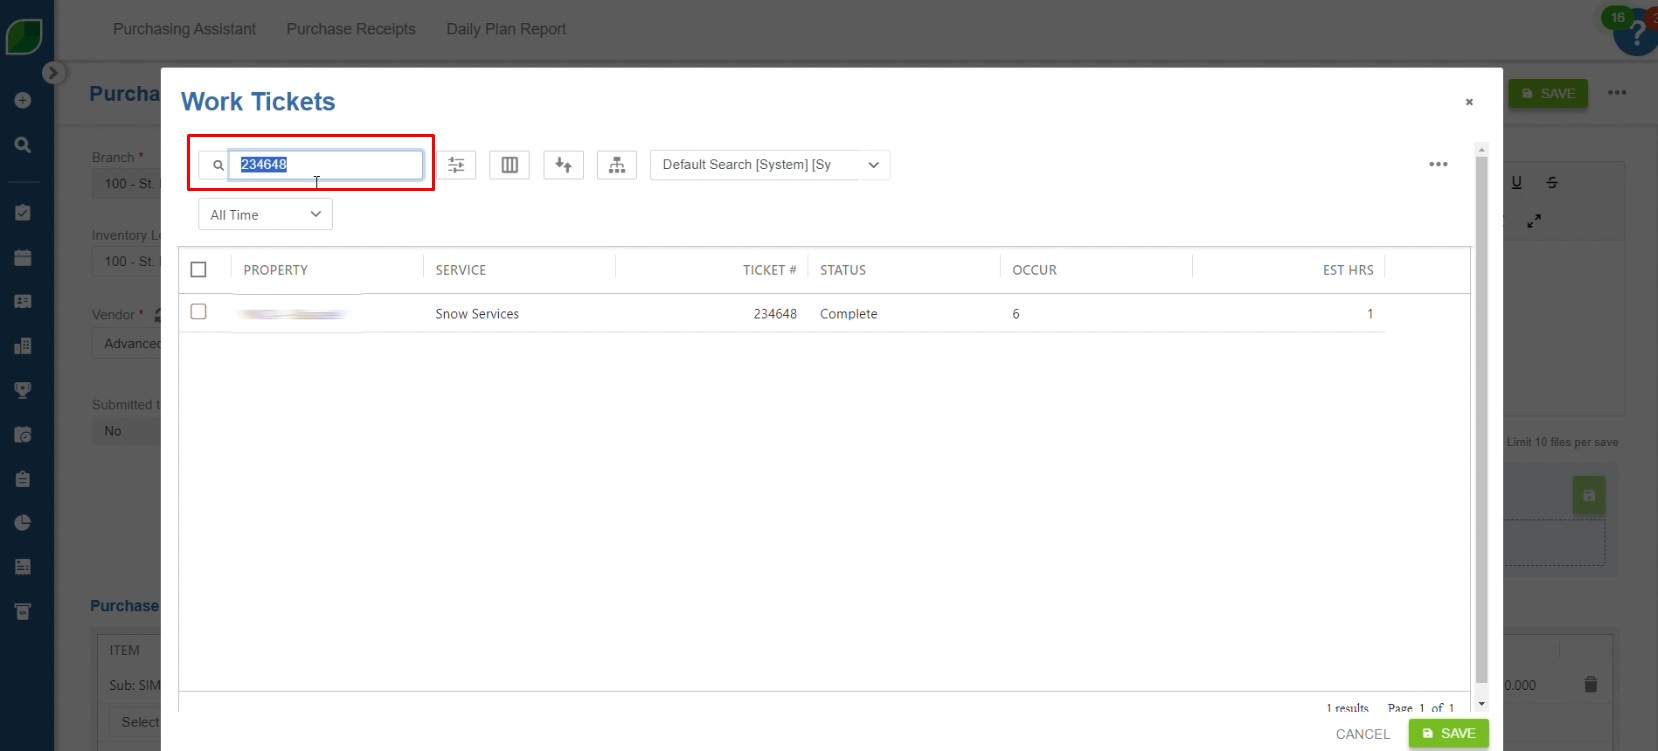
8. Go to ‘Work Ticket’ and enter the ticket number in the search bar
- Navigate to the ‘Work Ticket’ section.
- Paste the ticket number into the search bar and open the ticket profile.
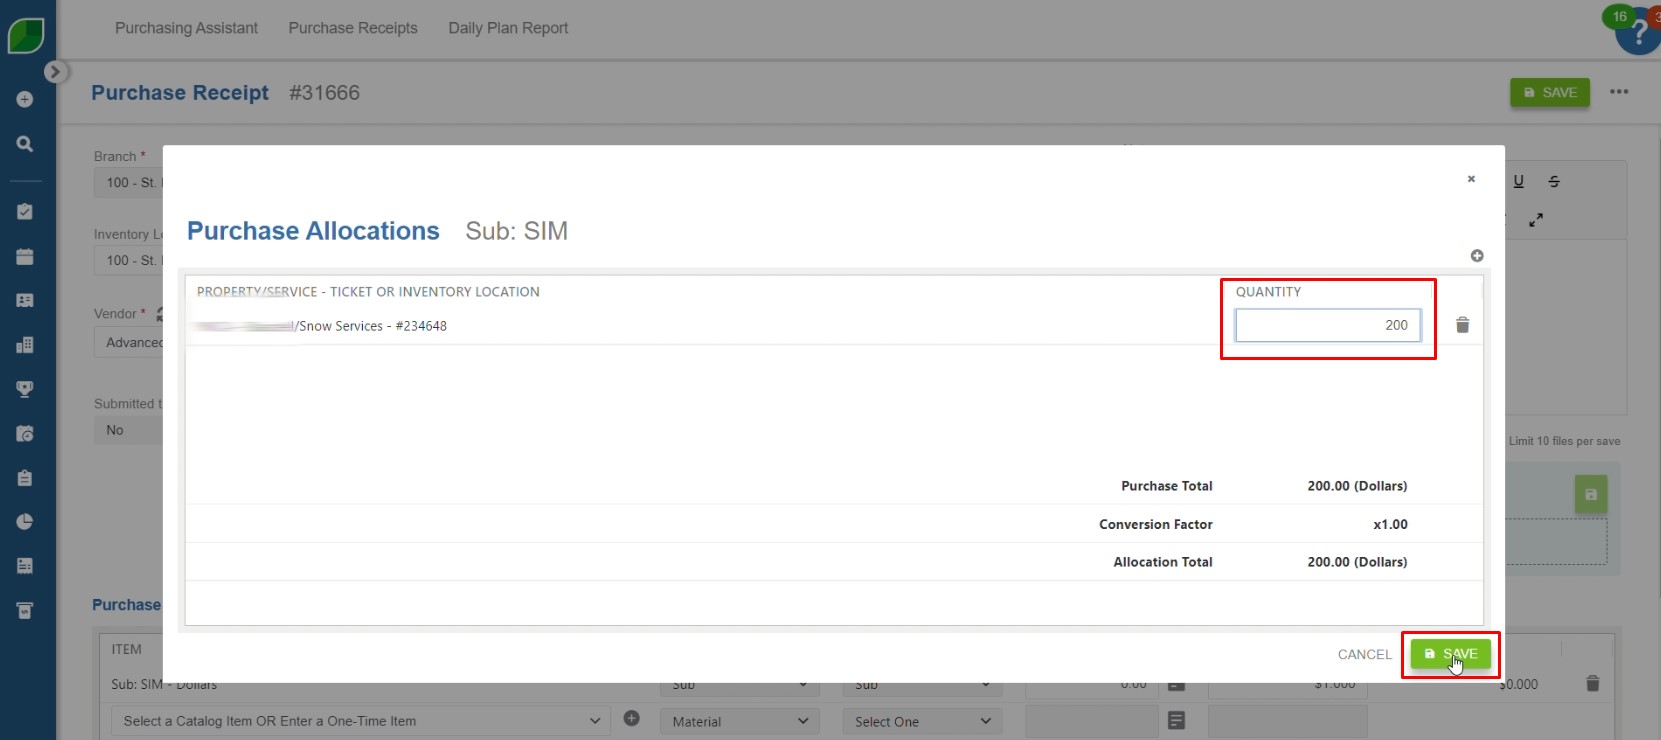
9. Enter the quantity of purchase item in ‘Quantities’ on the ‘Purchase Allocation’ tab and click ‘Save’
- Once again, the ‘Purchase Allocation’ tab will appear for the selected ticket.
- Enter the quantity of the purchased item in the ‘Quantities’ section.
- After entering the quantities, click ‘Save’ to confirm the allocation.
10. Click ‘Save’ on the ‘Purchase Receipt’
- Finally, ensure all information is correct and click ‘Save’ on the ‘Purchase Receipt’ to complete the process.

By following this step-by-step guide, you can efficiently manage both purchase receipts and work tickets in Aspire, ensuring that all details are accurately recorded and aligned with your client’s invoices. This streamlined approach not only keeps your purchasing records organized but also enhances the overall efficiency of your operations.
Download a PDF version of the job aide here.