This job aid provides step-by-step instructions for completing work tickets and generating invoices using the Aspire system. Following these steps will ensure that all necessary information is properly entered, and work tickets are accurately processed. This guide is essential for managing tasks, ensuring smooth workflow, and completing invoices efficiently.
Steps for Completing Work Tickets:
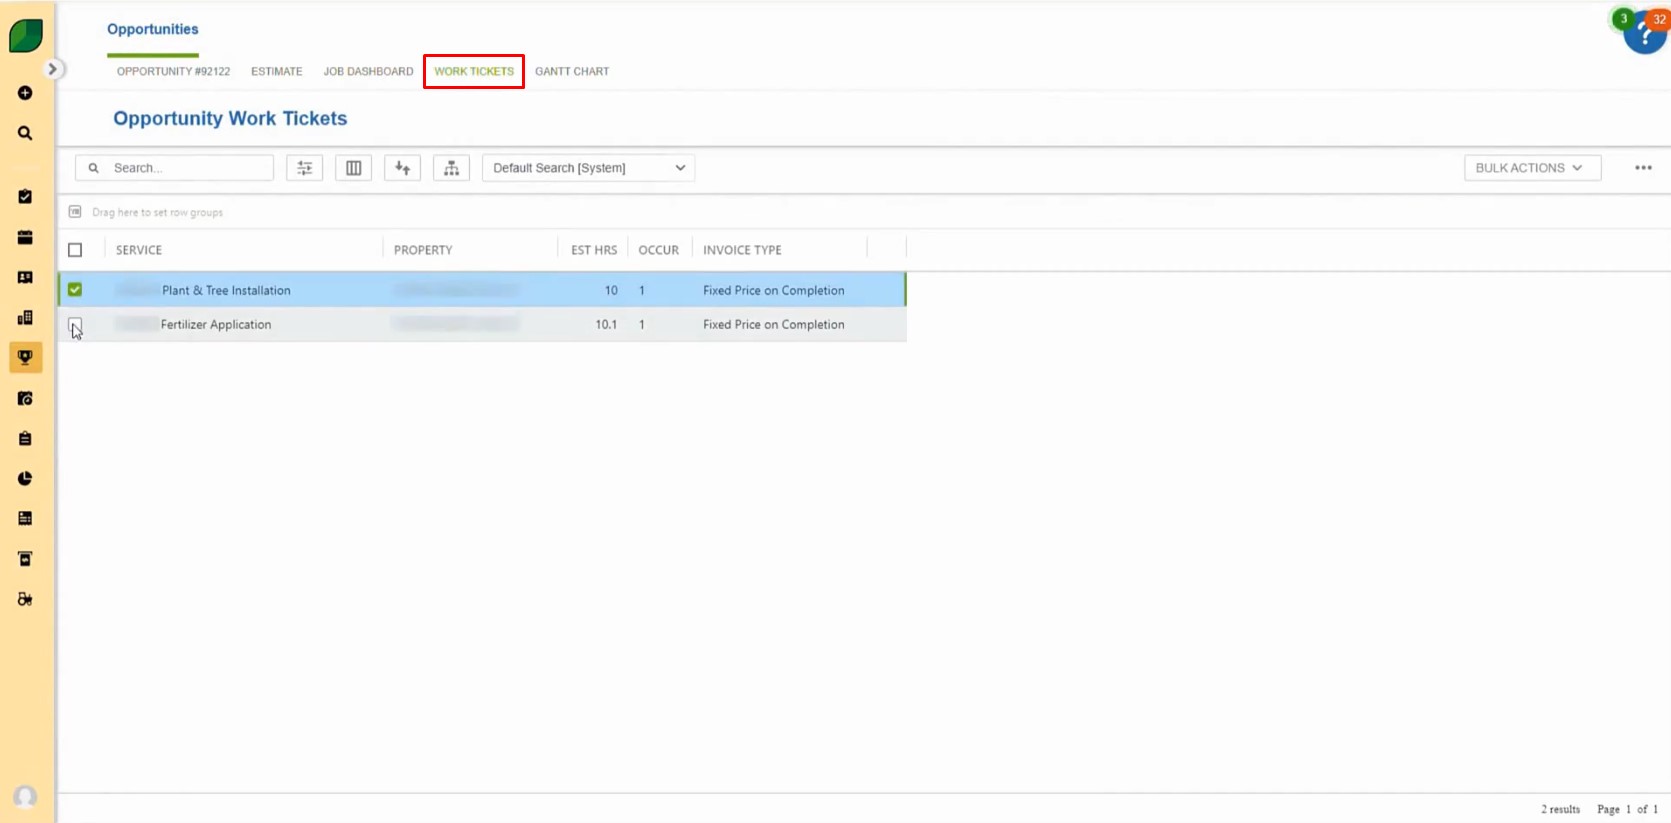
1. Access Work Tickets:
- Click on the Work Tickets tab in the Aspire system.
- Select the relevant tickets by checking the box next to each ticket that needs to be completed.
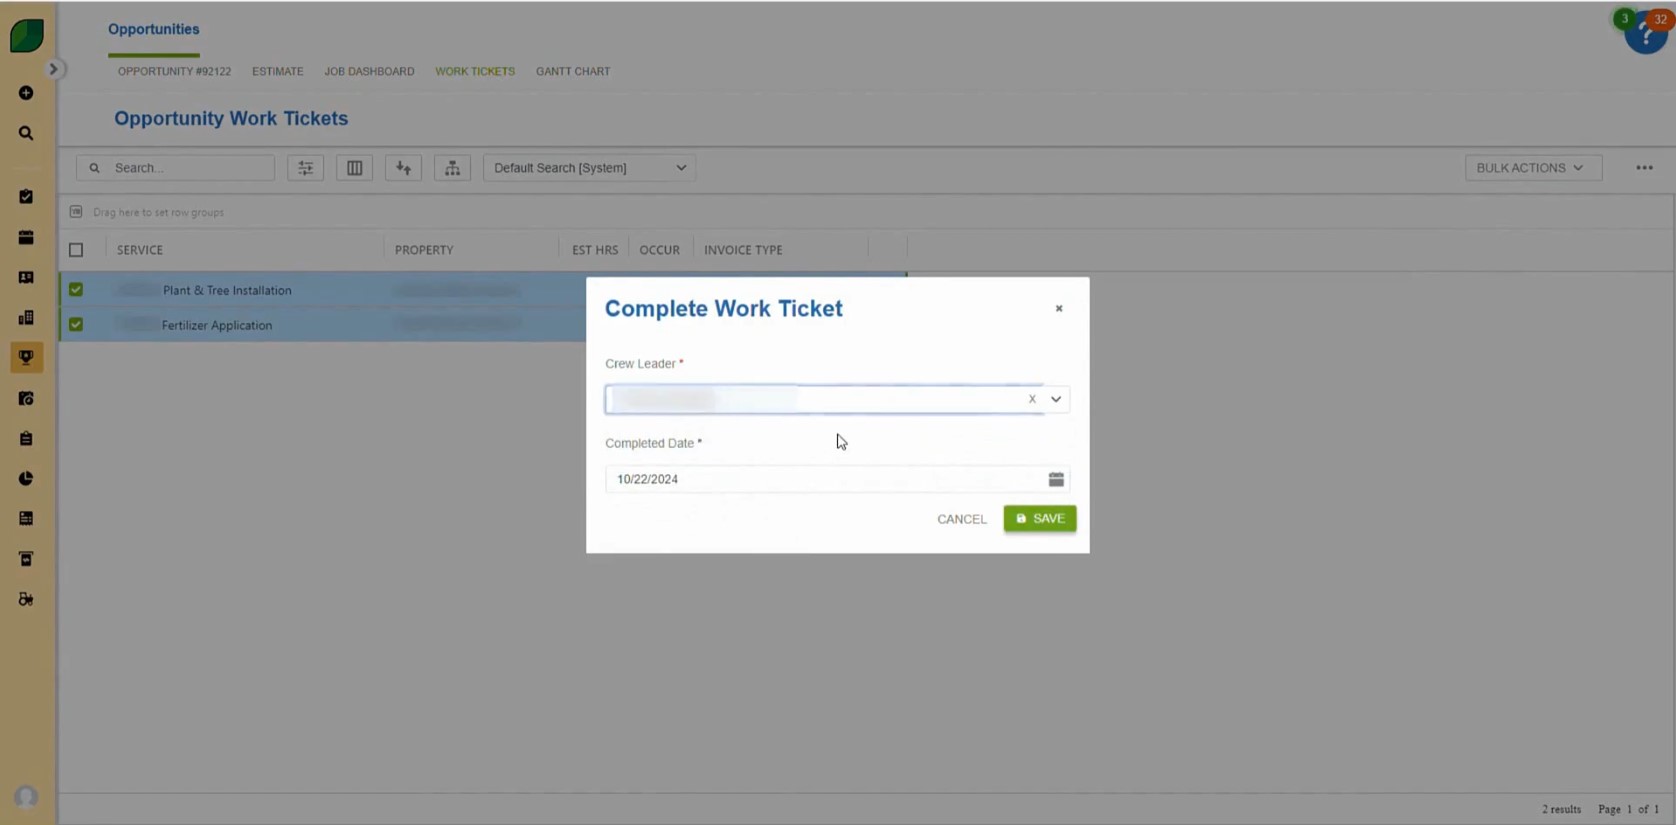
2. Complete Work Tickets:
- On the right side, click on the Bulk Actions drop-down menu and select Complete.
- A “Complete Work Ticket” window will pop up. Under the Crew Leader field, verify the property name that is shown.
- Once verified, click Save.
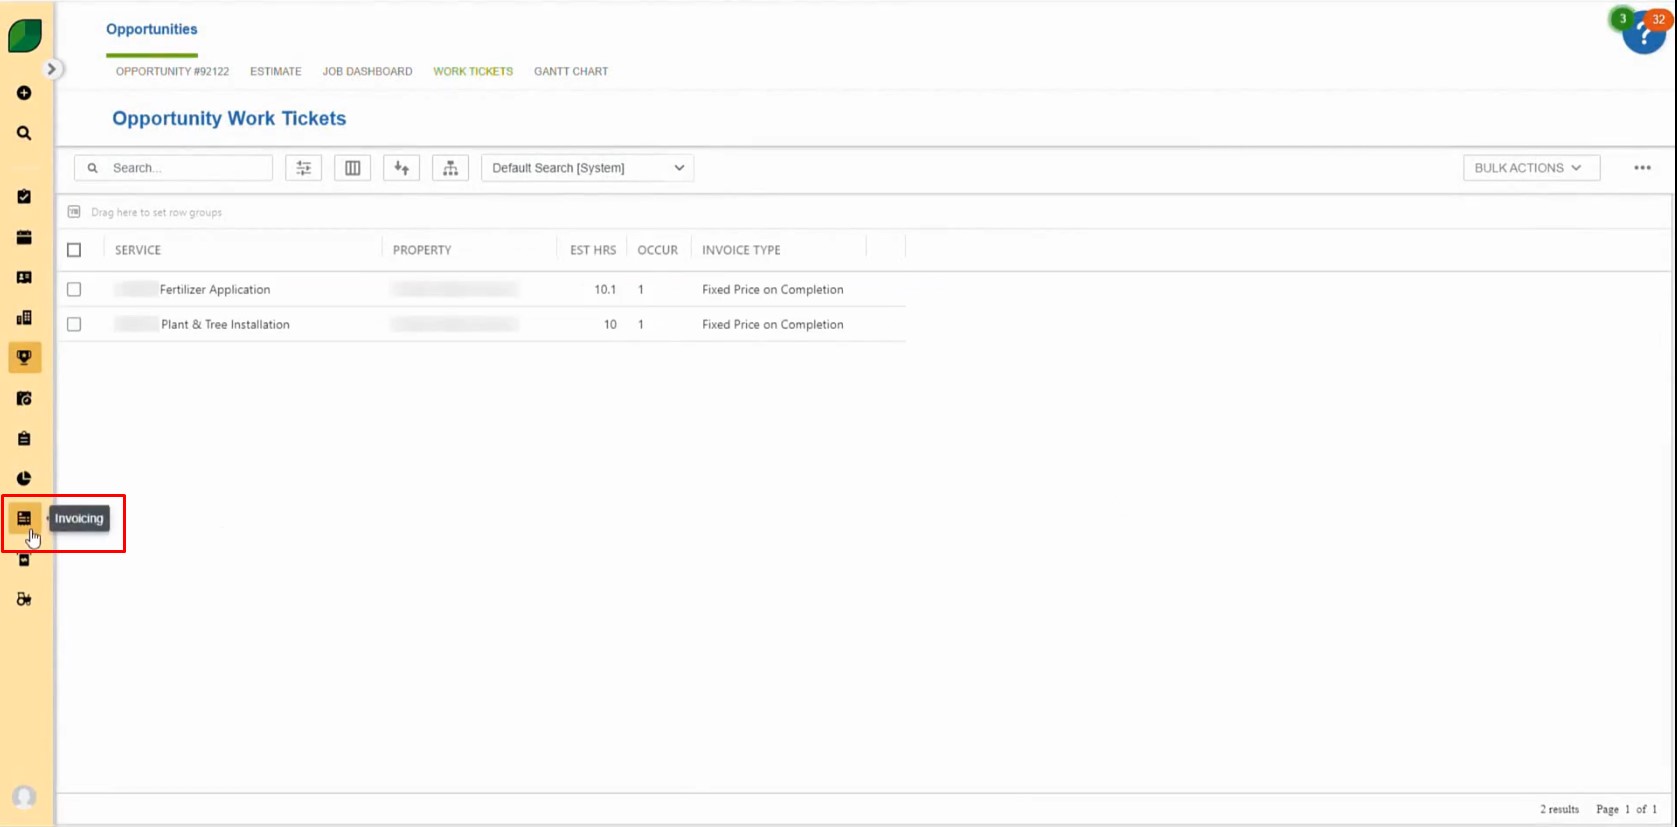
3. Invoicing Setup:
- In the sidebar, click on Invoicing.
- On the top left of the screen, search for the ticket number (be sure to note this number for reference).
- Once the ticket status appears, select Address Required.
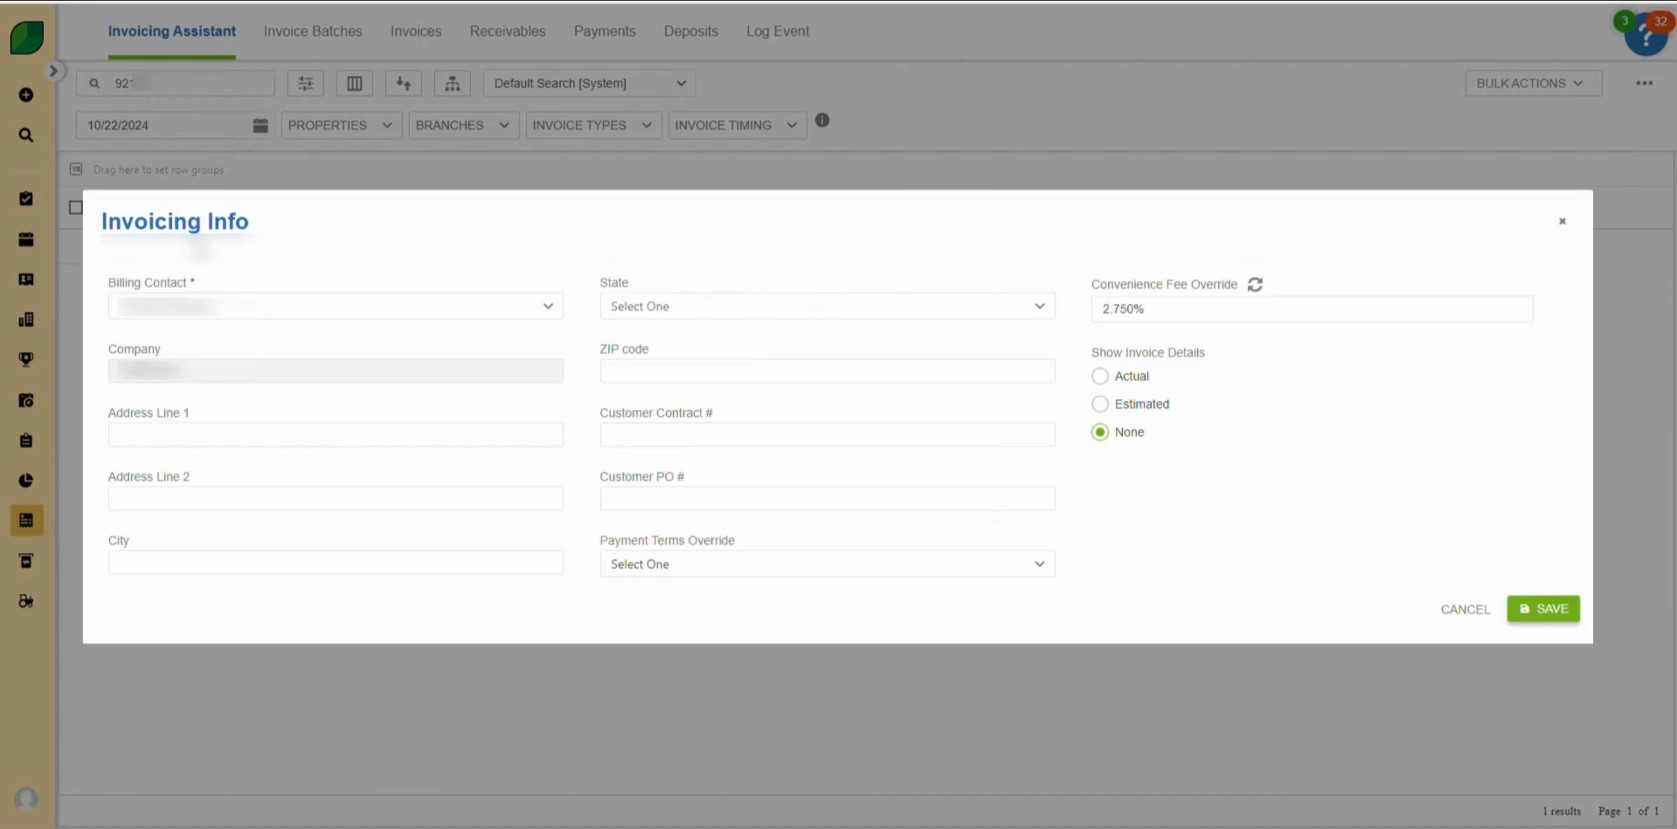
- A window will open, prompting you to fill in the address details:
- Select the State.
- Enter the Address, Zip Code, and City.
- After entering the details, click Save.
4. Generating Invoices:
- After saving the address, the ticket status will change to Ready from Action Required.
- Select the ticket again and, from the Bulk Actions menu on the right side, click Generate Invoice and then click Save.
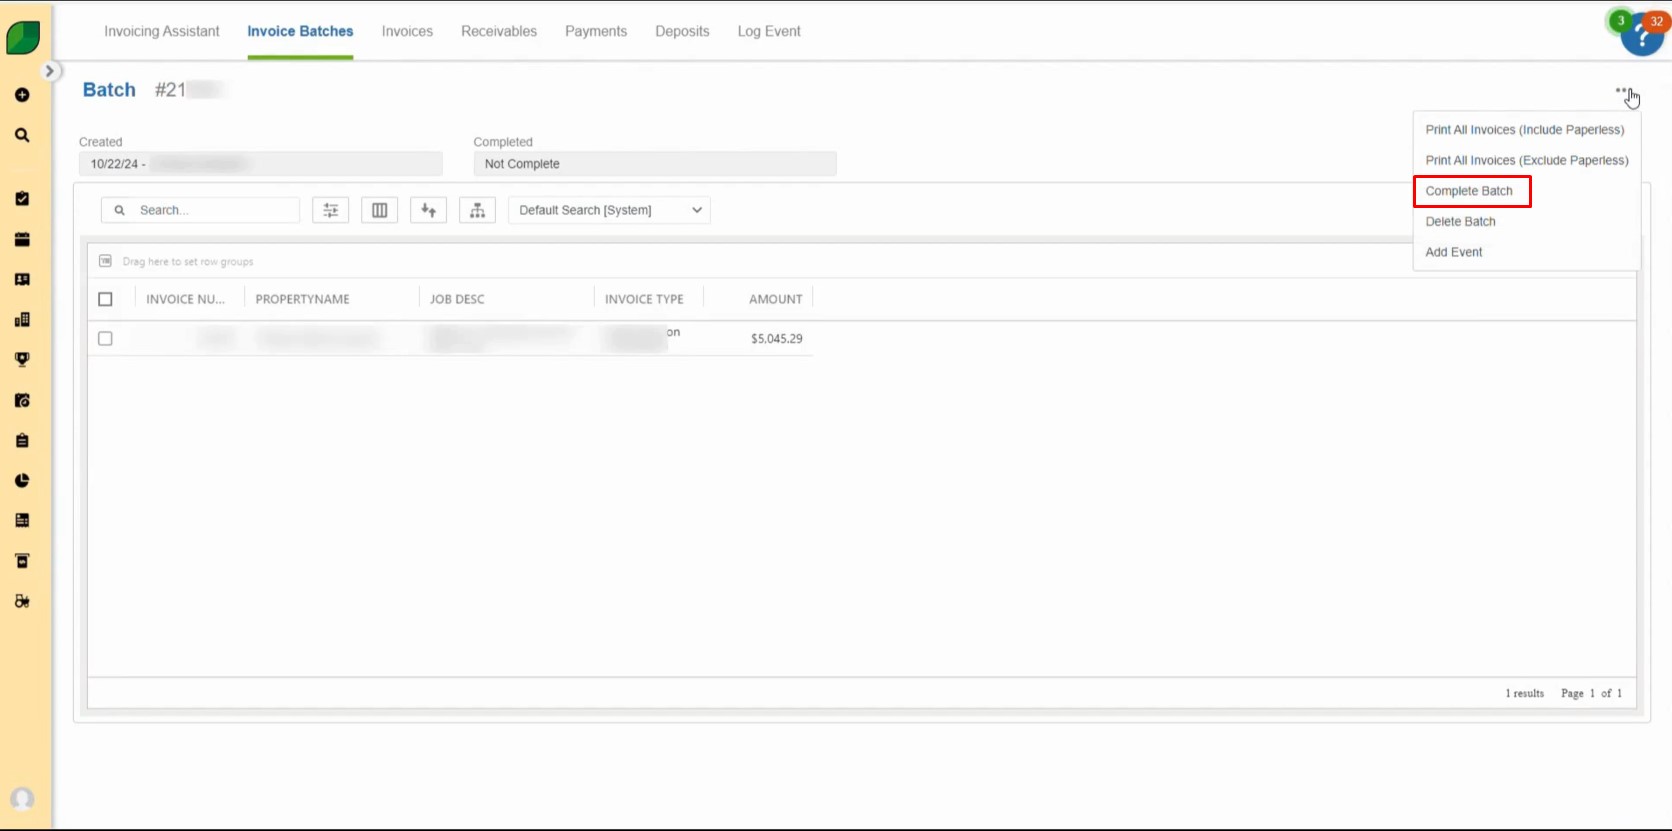
- Next, click on the three dots next to Bulk Actions and select Complete Batch.
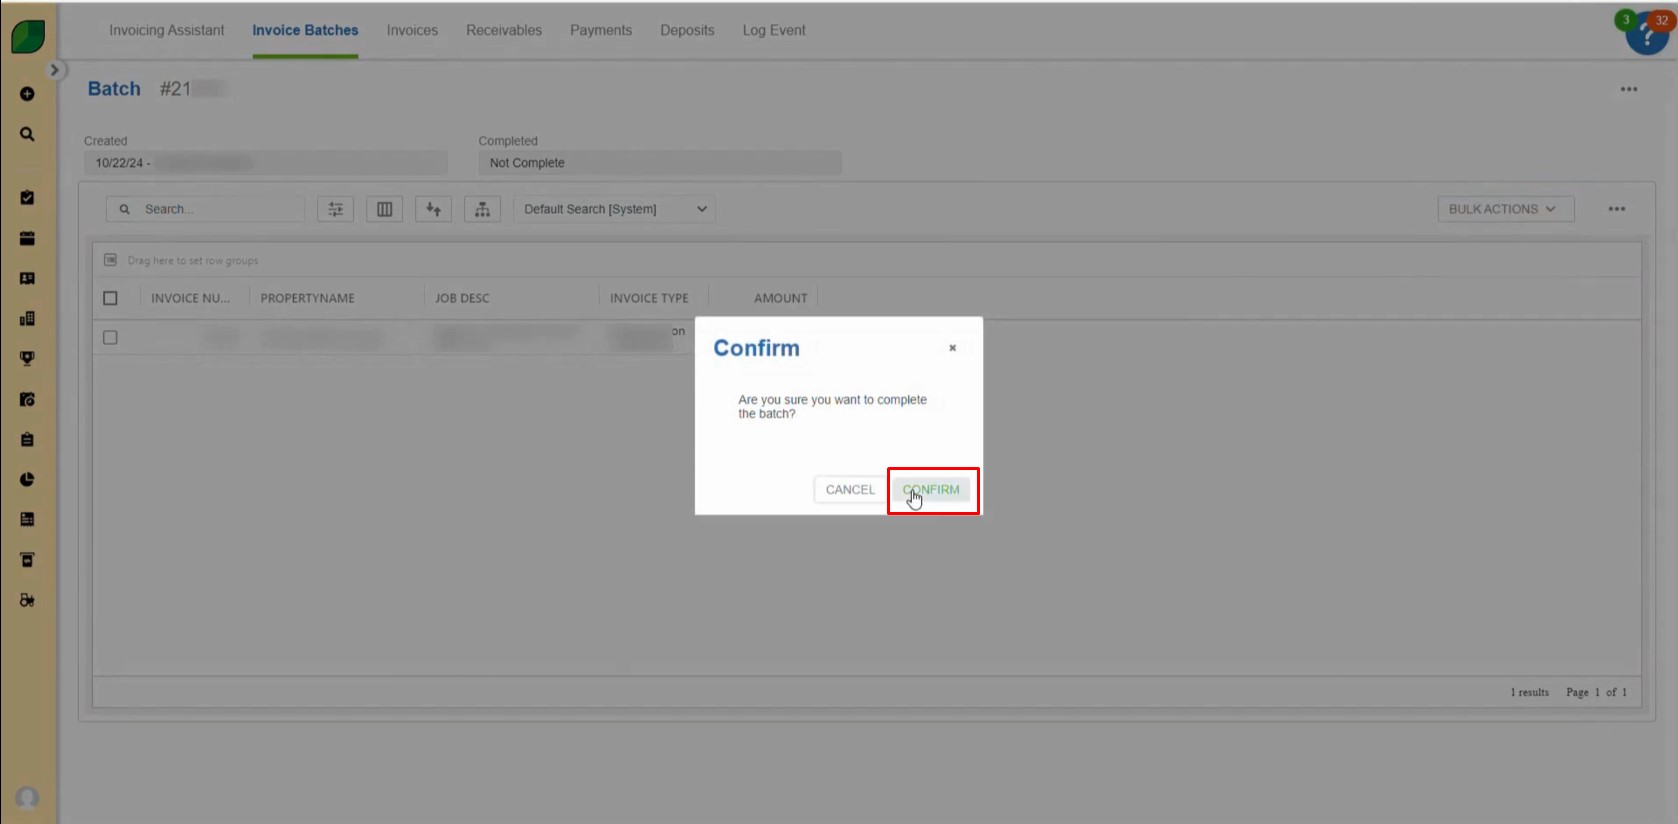
- Confirm the completion by clicking Confirm.
5. Printing the Invoice:
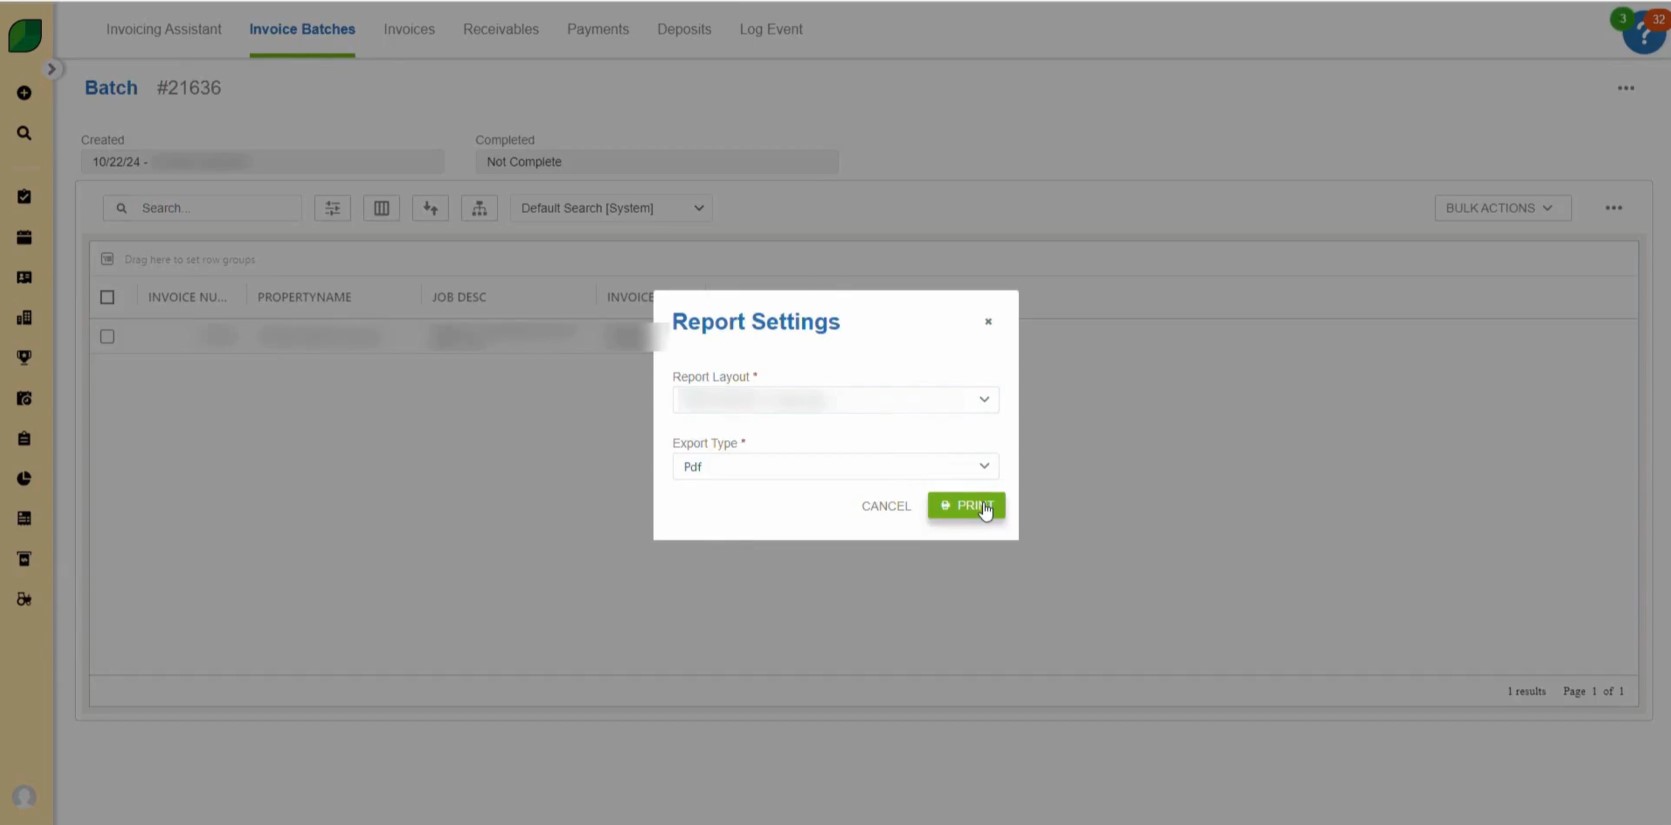
- The Report Setting window will pop up.
- Under the report settings, select Invoice DI and click on Print.
- This process will clear the ticket.
Steps for Payment Processing:
1. Locate and Copy Invoice Number:
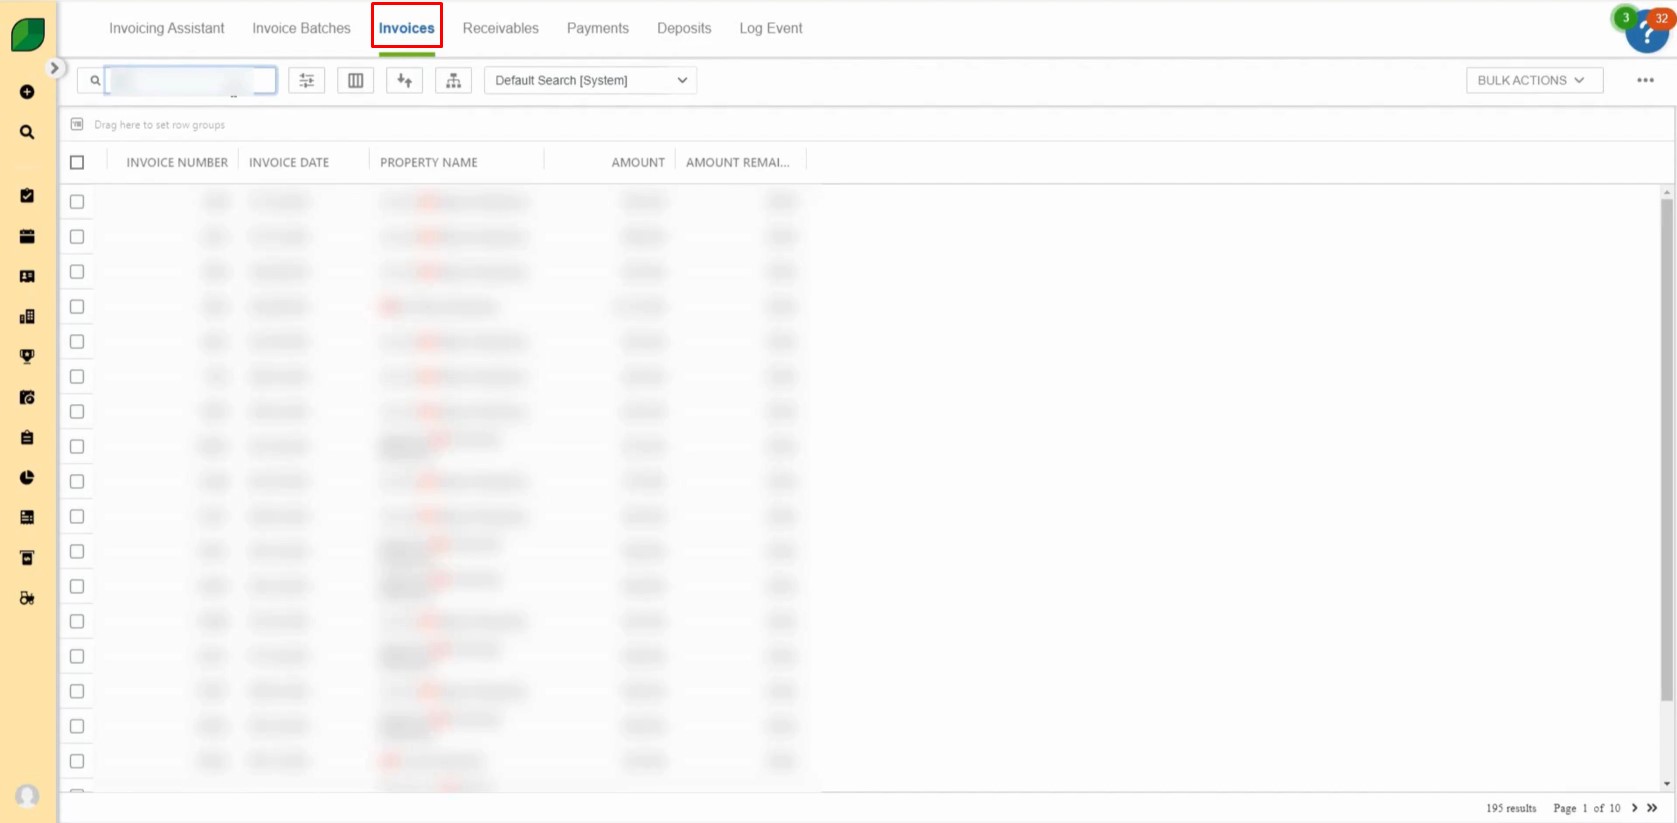
- Go back to Invoices at the top of the page.
- Search for the invoice by its number or amount.
- Click on the invoice number, and once it appears, copy it from the top of the page.
2. Apply the Payment:
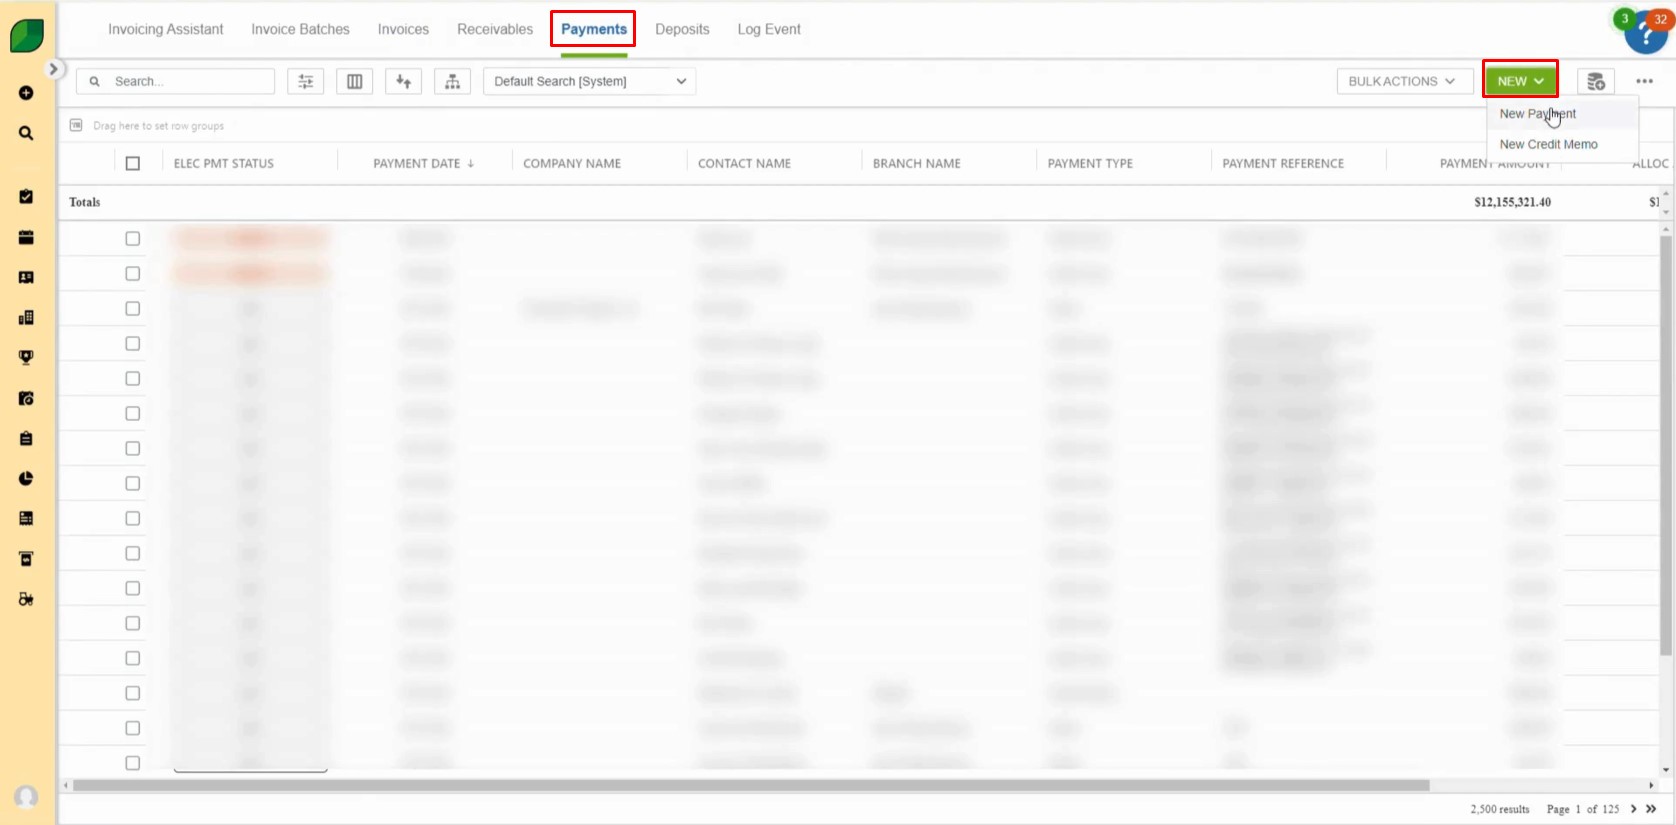
- Click on Payments, located next to Bulk Actions.
- Select New and then choose New Payment.
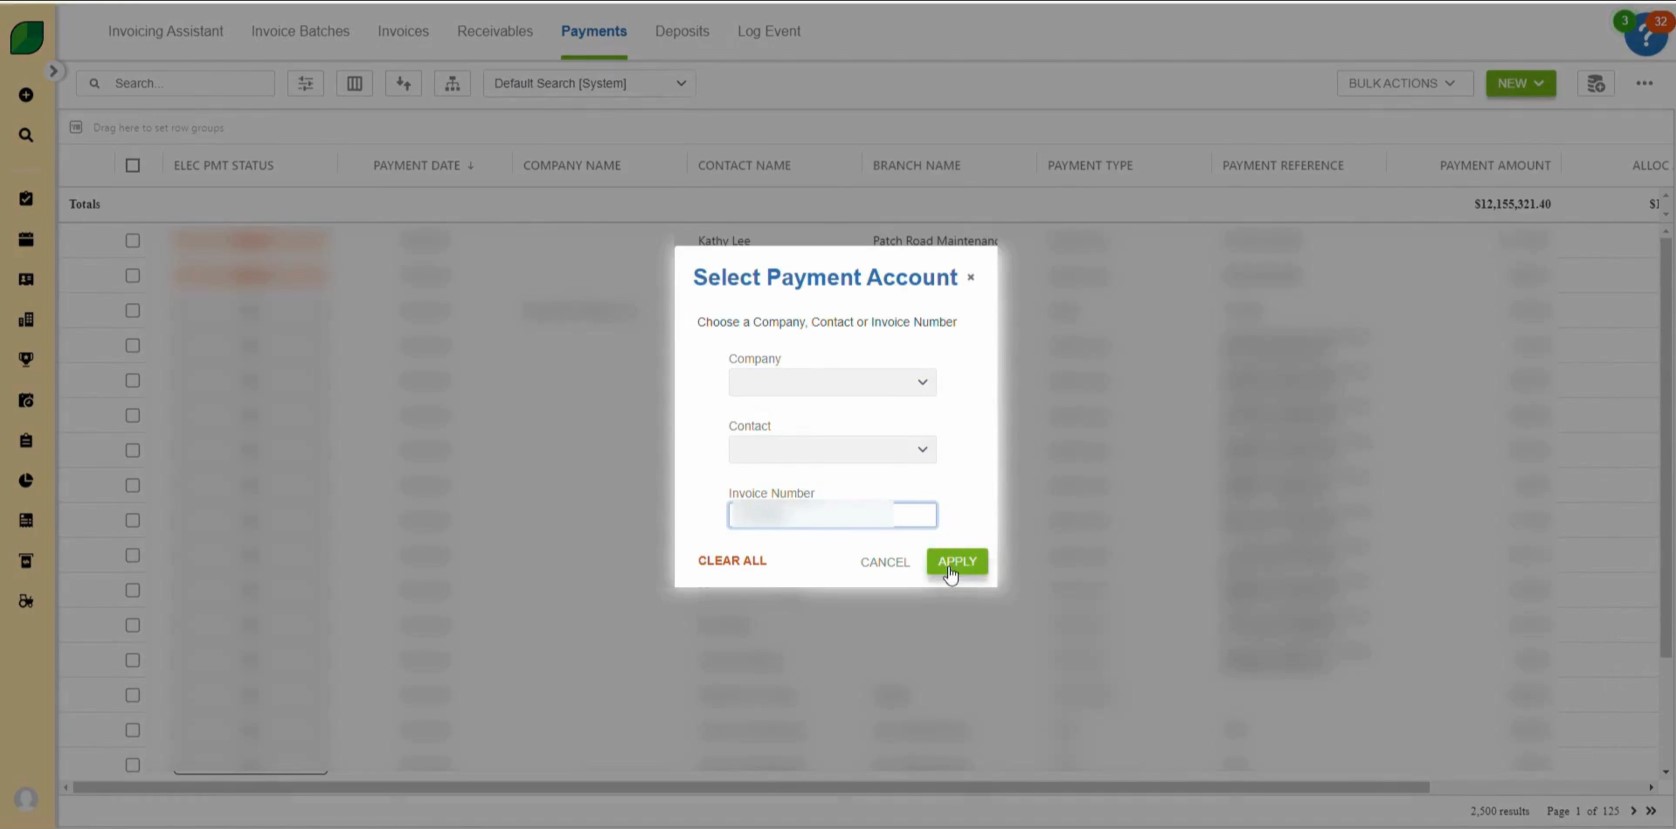
- In the new payment window, paste the copied invoice number and click Apply.
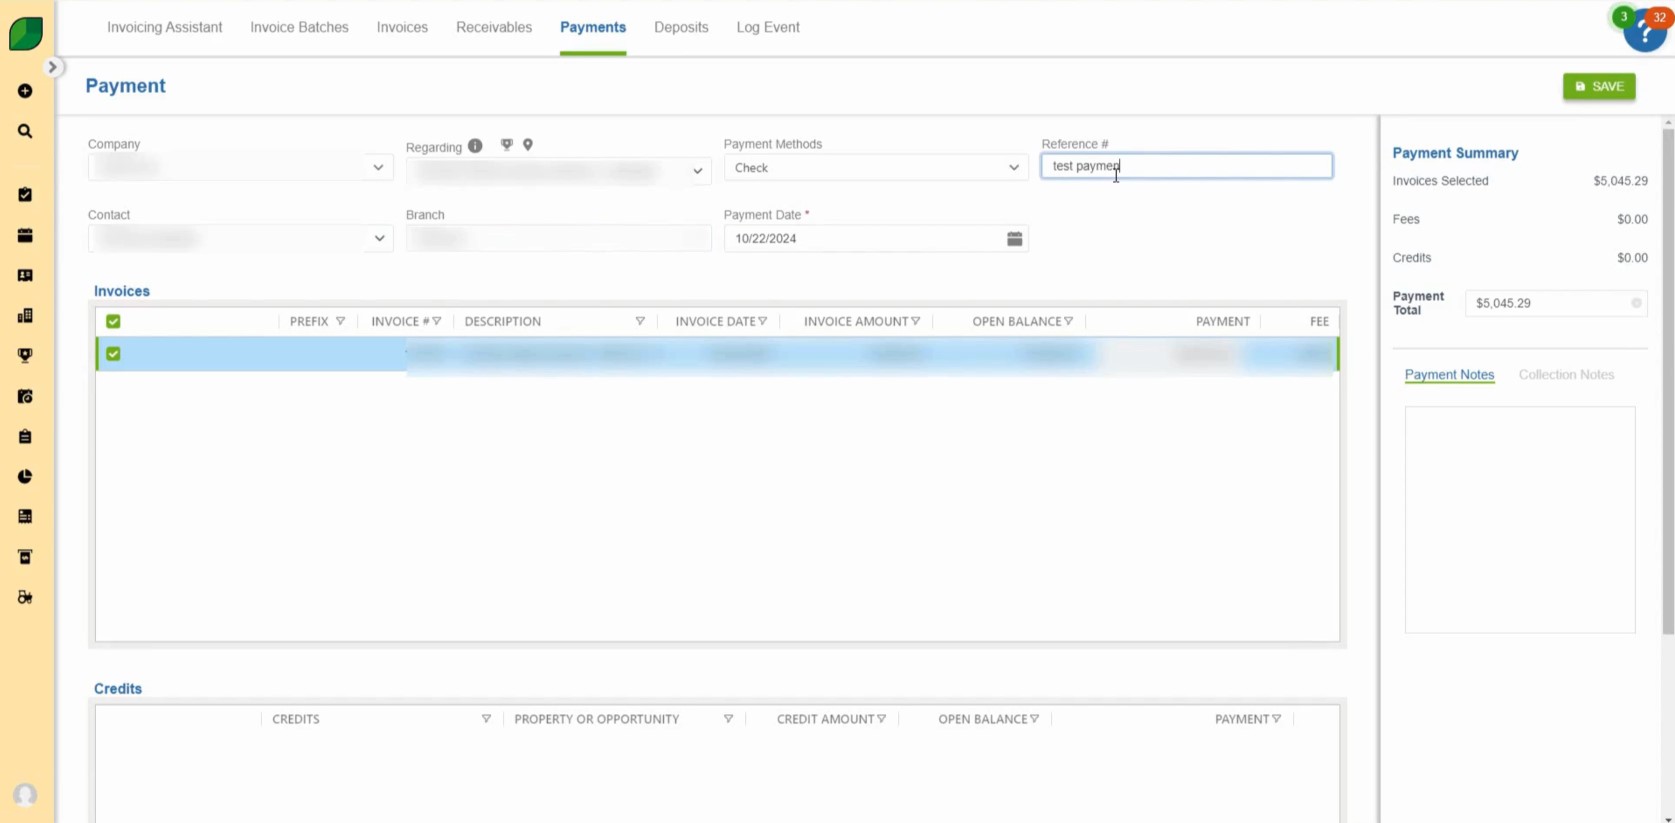
- A payment window will open.
- Under the Regarding section, enter the invoice number and select the appropriate name.
- Fill in the Branch and set the Reference Number to “Test Payment”.
- Finally, click Save.
3. Finalizing the Ticket:
- After saving, the ticket process will be complete.
By following these instructions, you can ensure that work tickets are properly completed, invoices are generated, and payments are applied within Aspire. Proper completion of these tasks is crucial for maintaining accuracy and ensuring efficient workflow management. Use this guide as a quick reference for handling work tickets and invoicing within the system.
Download a PDF version of the job aide here.

