Work ticket scheduling plays a crucial role in maintaining efficient operations within Aspire. By managing client-provided property lists and adhering to specific date requirements, we ensure that all tickets are accurately scheduled and updated. With a focus on recurring services and customizable preferences, our streamlined approach helps keep everything organized and on track for timely completion.
This guide will walk you through the simple steps to work ticket scheduling for your tickets. Whether you’re setting new schedules or adjusting existing ones, follow these easy instructions to keep everything on track.
Steps to Edit Recurring Scheduling:
1. Access Scheduling:
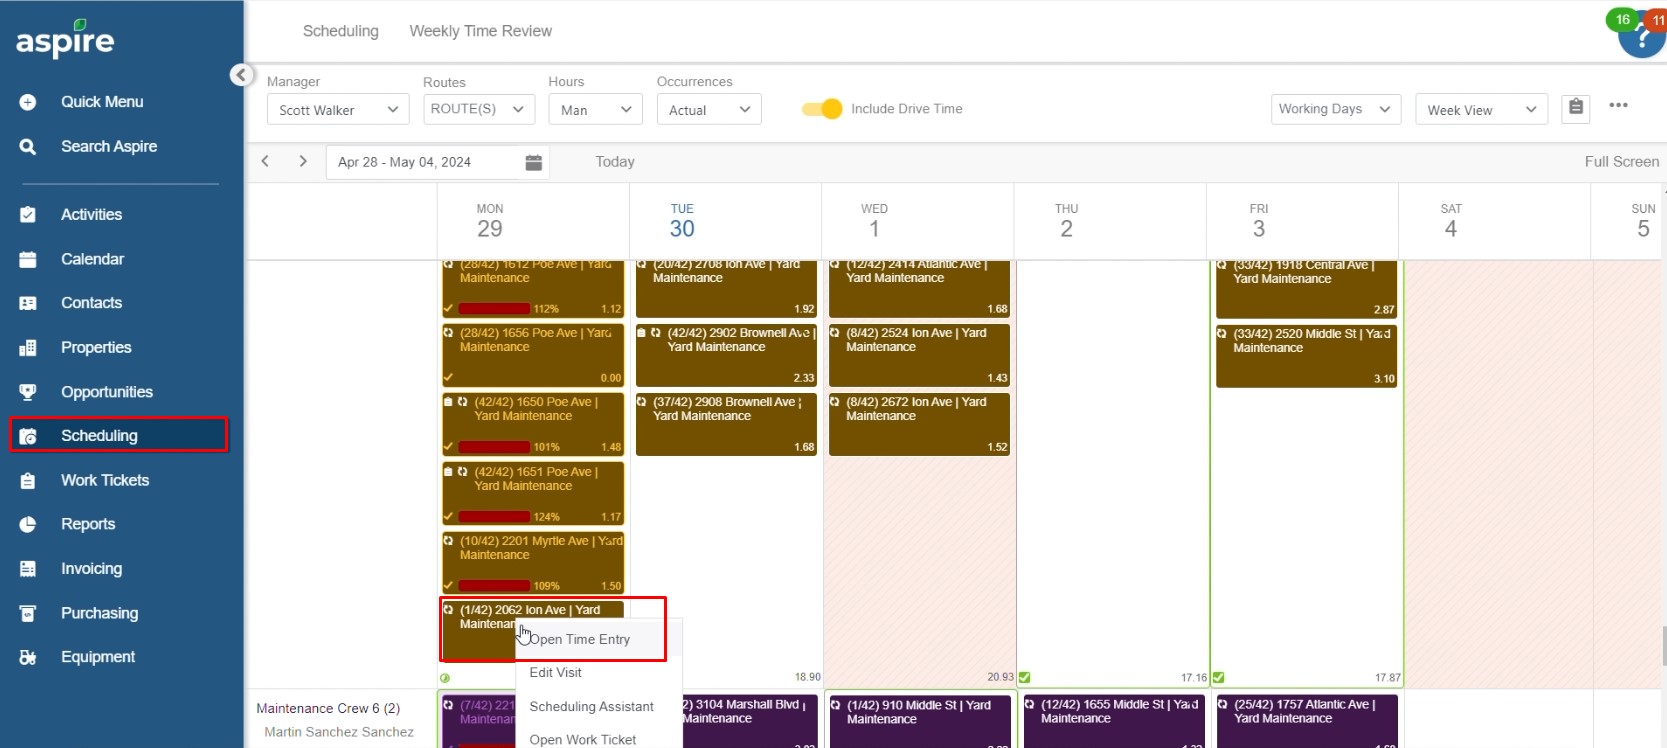
- Go to the ‘Scheduling’ section in Aspire.
- Locate the ticket you want to adjust, then right-click on the ticket.
2. Edit Recurring Scheduling:
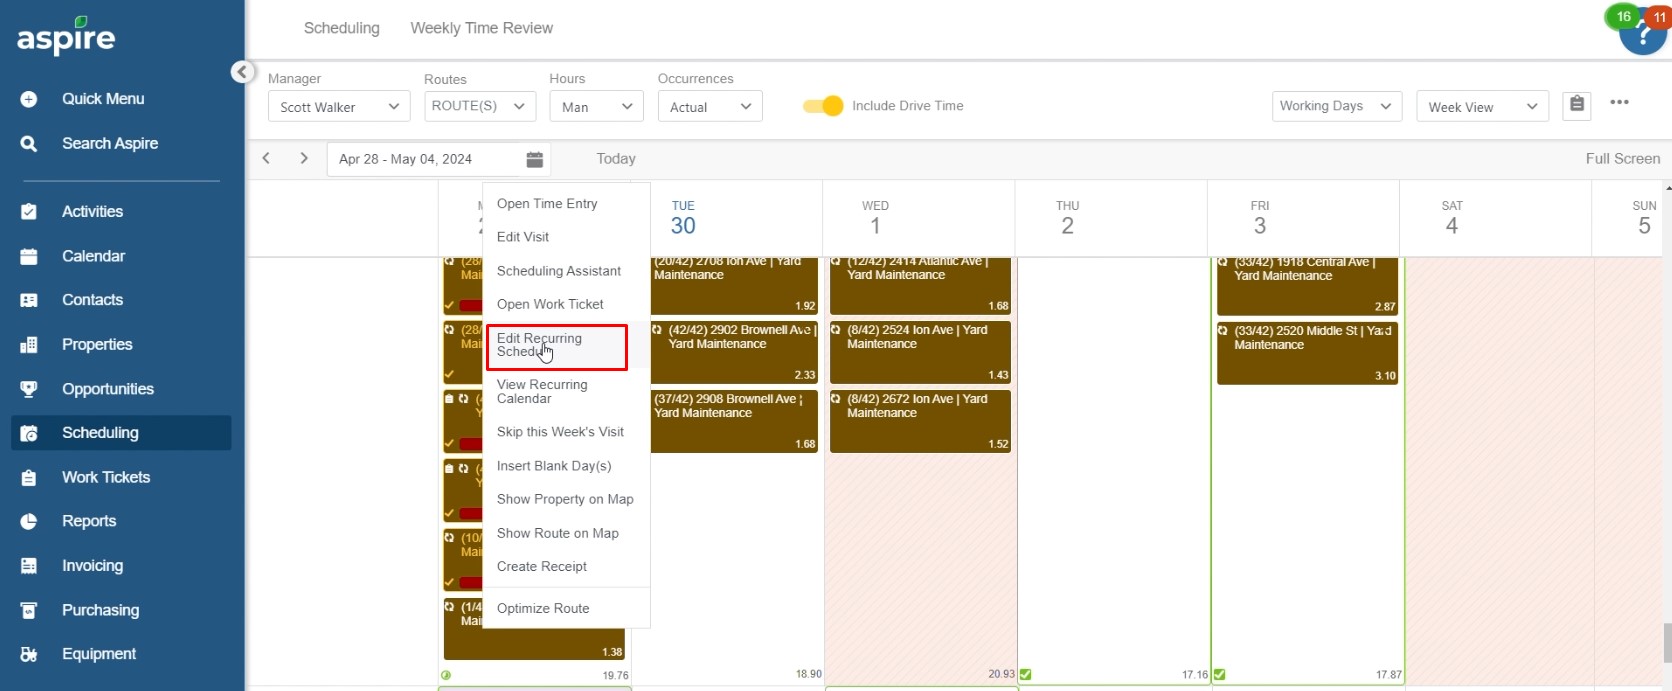
- From the options, select ‘Edit Recurring Scheduling’ to begin making changes.
3. Set Start Date:
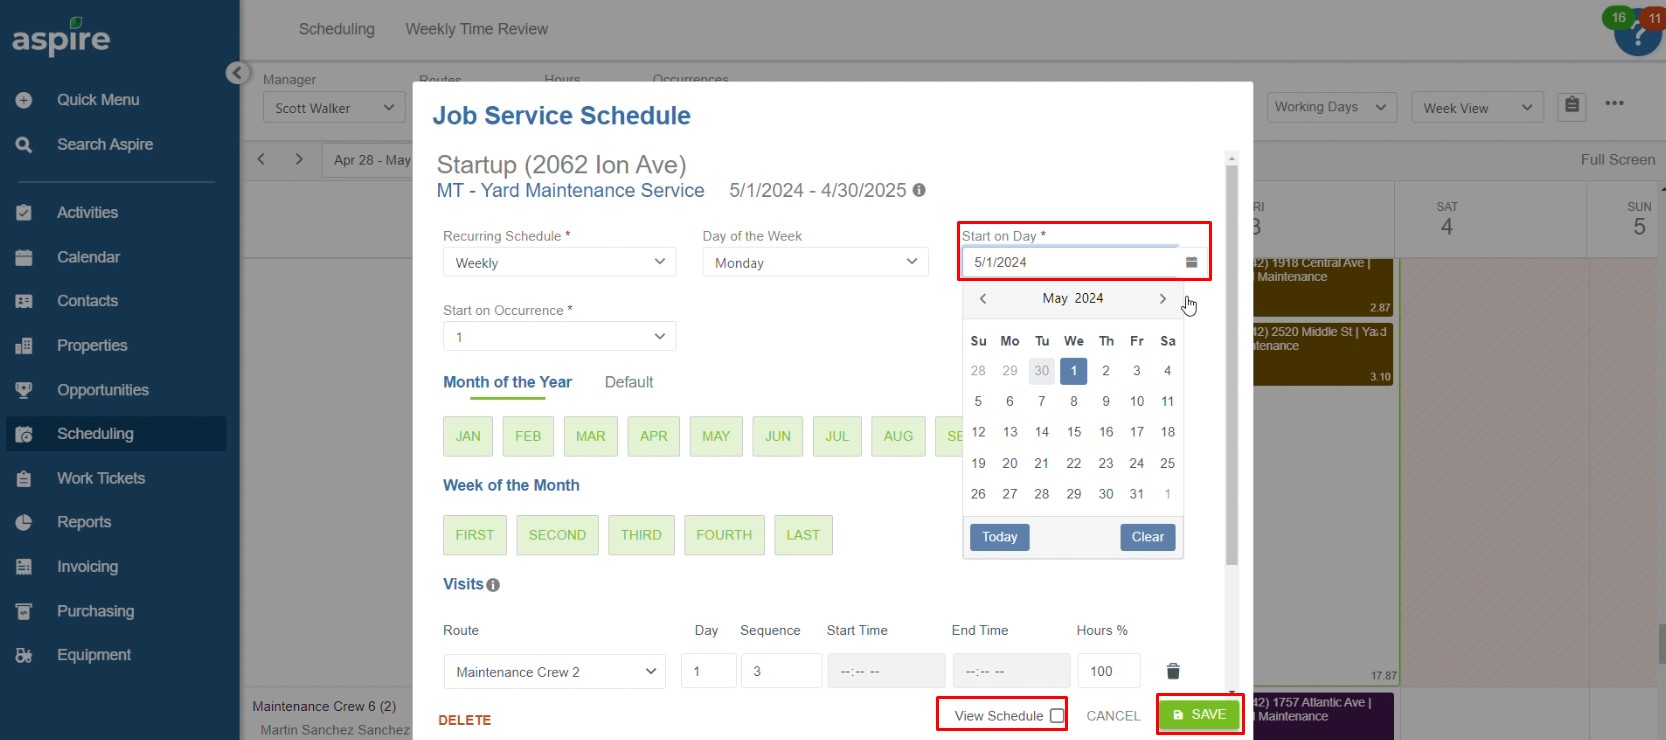
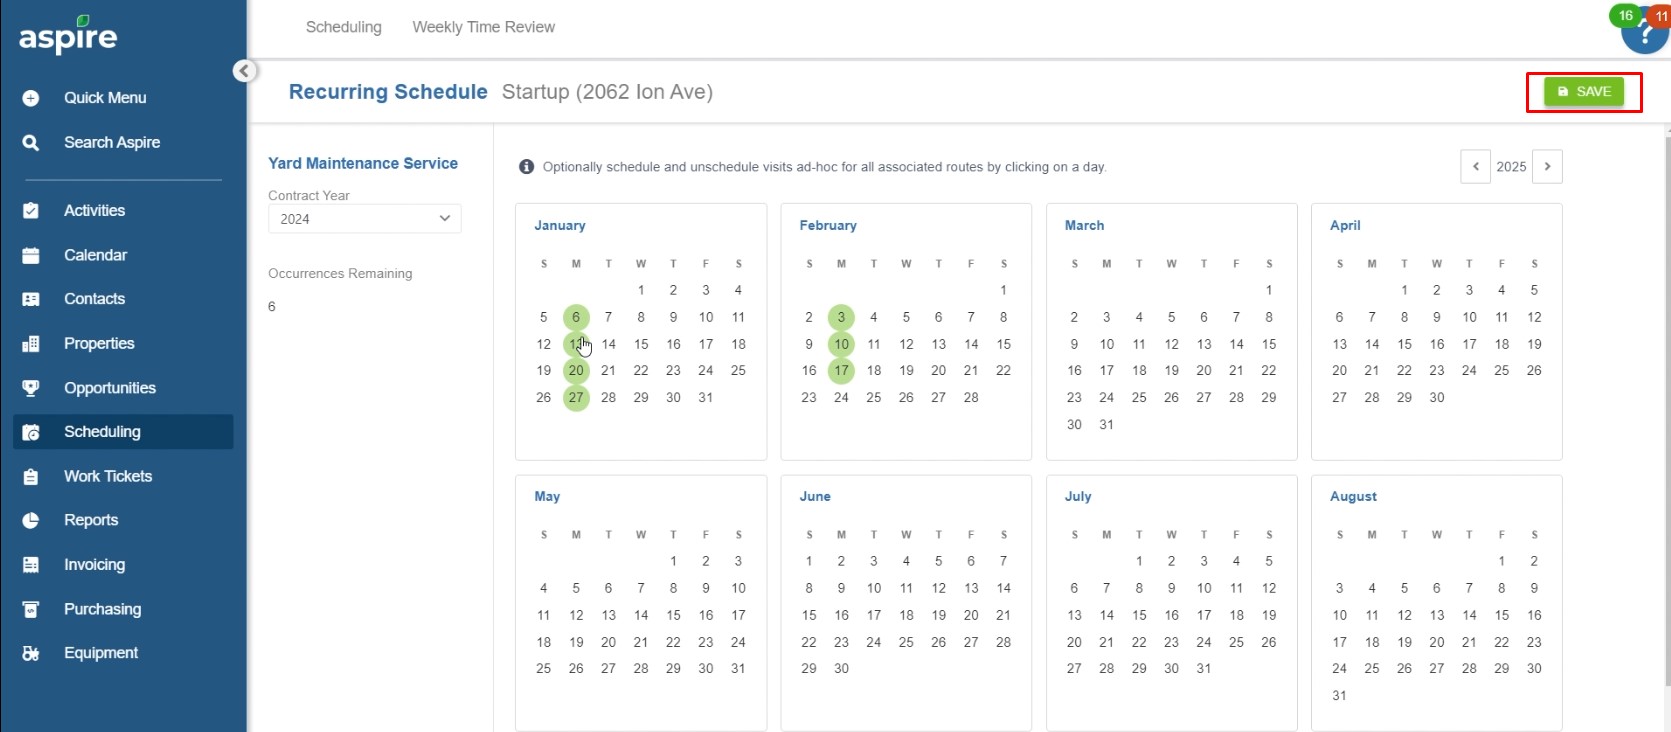
- In the scheduling window, set the desired ‘Start on Date’ for the recurring schedule.
- Tick the box labeled ‘View Schedule’ to view the schedule details.
- Once set, click ‘Save’ to confirm the changes.
4. Confirm Changes:
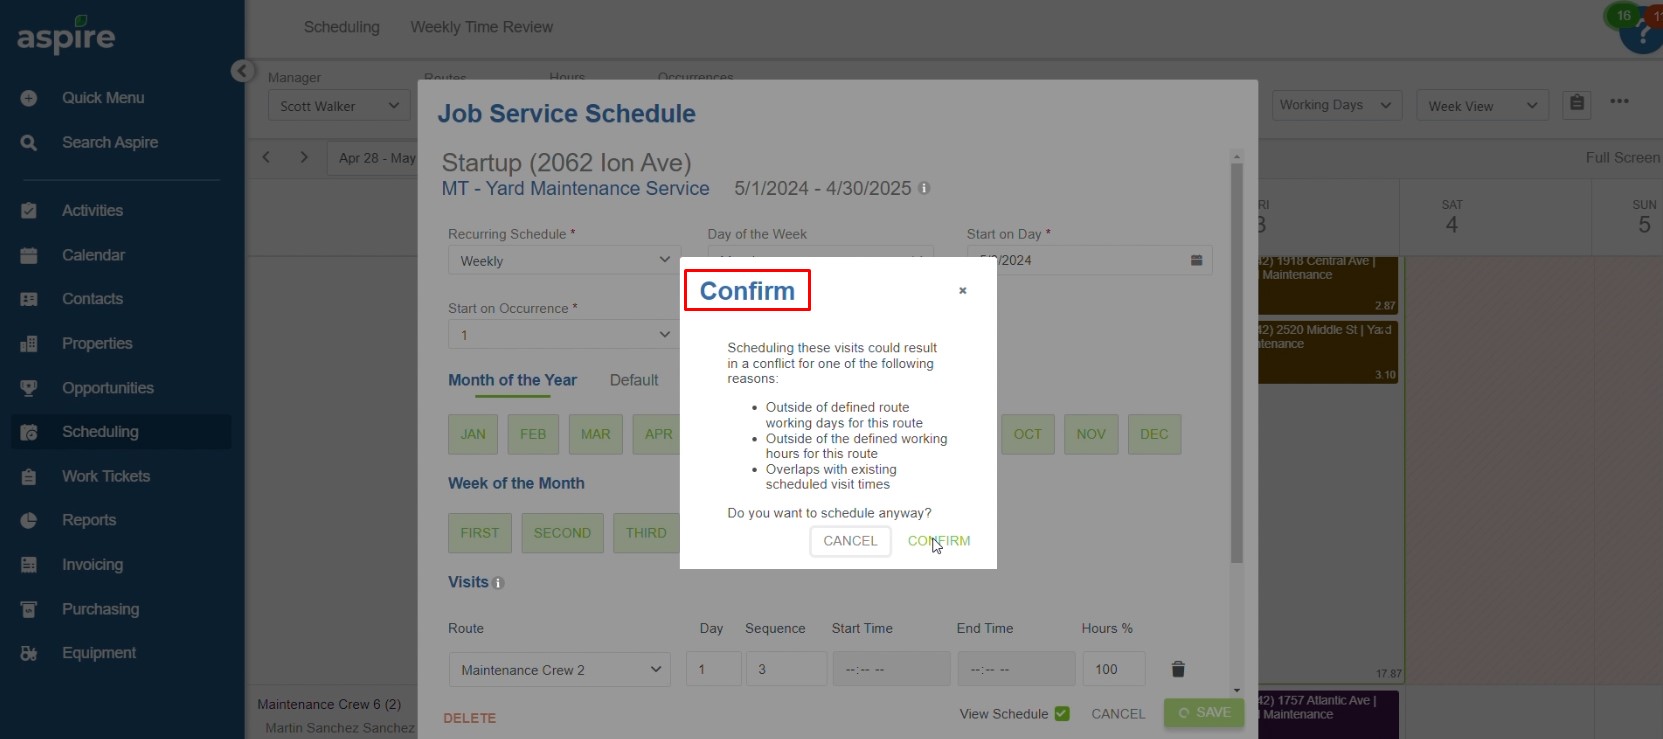
- After saving, click ‘Confirm’ to finalize the changes.
5. Optional Ad-hoc Adjustments:
- If needed, you can Schedule or Unschedule specific visits on an ad-hoc basis.
- After making these adjustments, click ‘Save’ and then ‘Confirm’ to complete the process.
Effective work ticket scheduling is key to ensuring smooth operations and timely service delivery in Aspire. By staying organized, adhering to client requirements, and utilizing tools like recurring schedules and property preferences, we can maintain efficiency and keep every task on track for success.
Download a PDF version of the job aide here.

