

Appointments in Aspire help organize communication and task management, especially when handling accounts receivable. By scheduling clear and timely meetings with relevant stakeholders, you ensure better follow-ups, accountability, and workflow efficiency. This job aid walks you through the simple steps to create an appointment within Aspire.
Steps to Create a New Appointment in Aspire
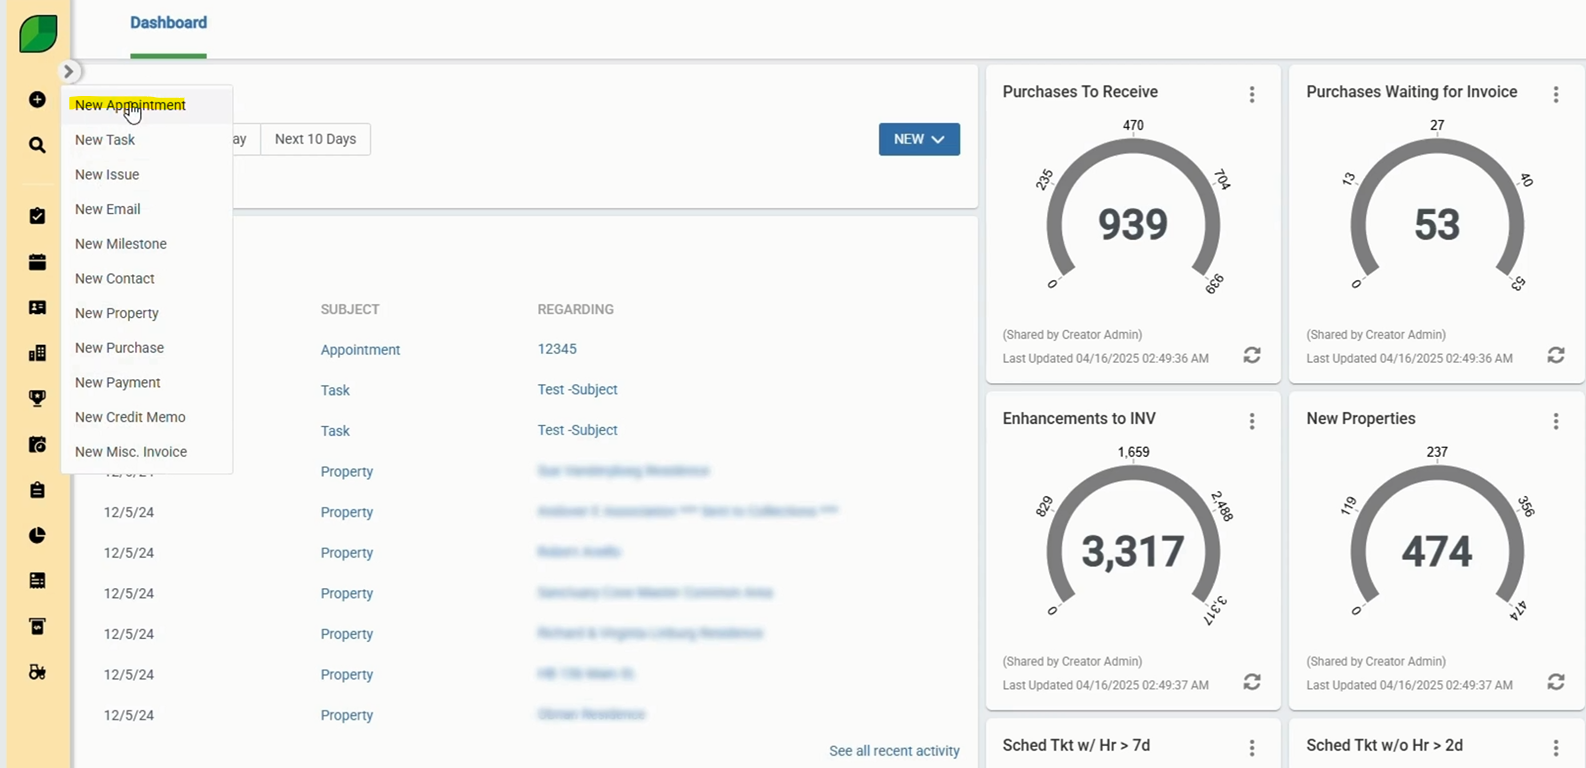
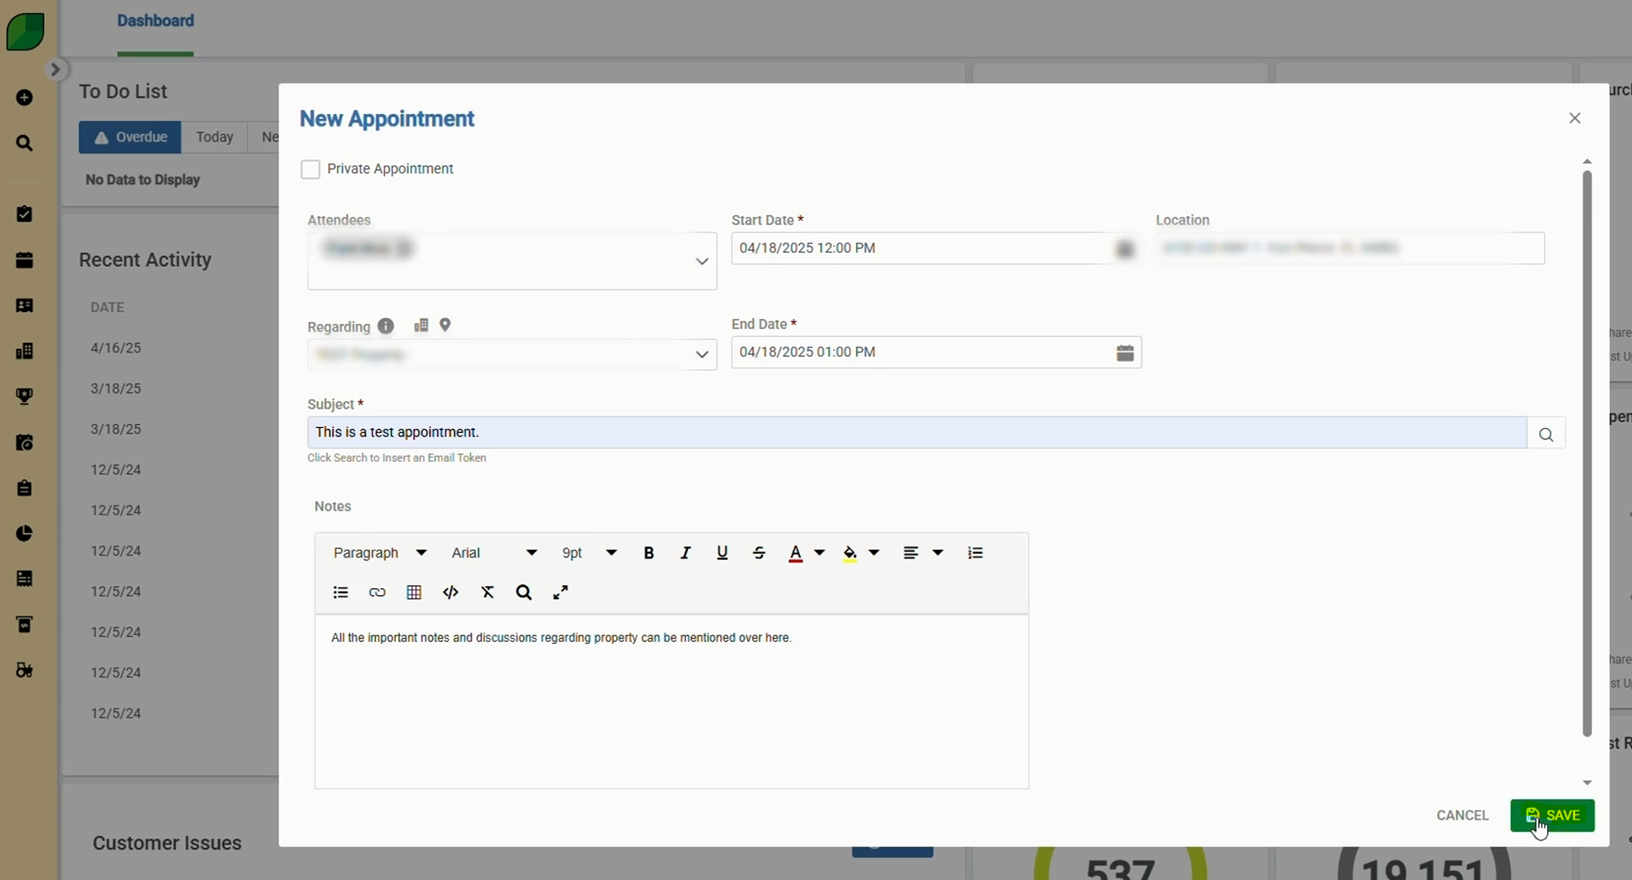
1. Click on the Plus Icon on the Aspire Dashboard and Select New Appointment
- Navigate to the main dashboard.
- Click on the “+” icon.
- Select New Appointment from the dropdown menu.
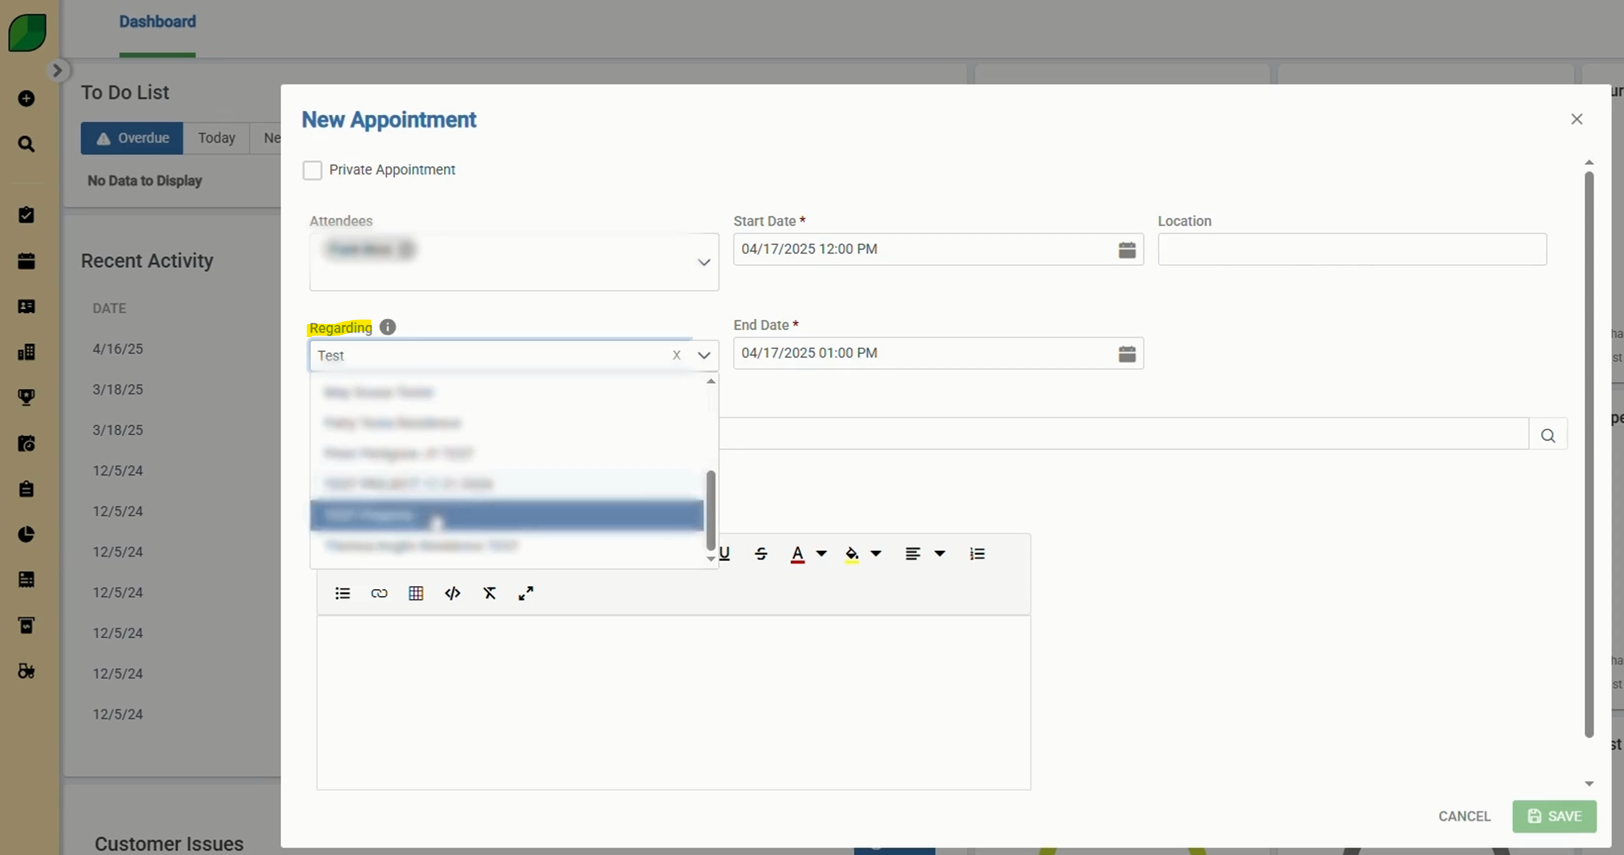
2. Enter What It’s ‘Regarding’ and Add Attendees
- Fill in the Regarding field to specify the appointment’s purpose.
- Add relevant Attendees to ensure appropriate involvement.
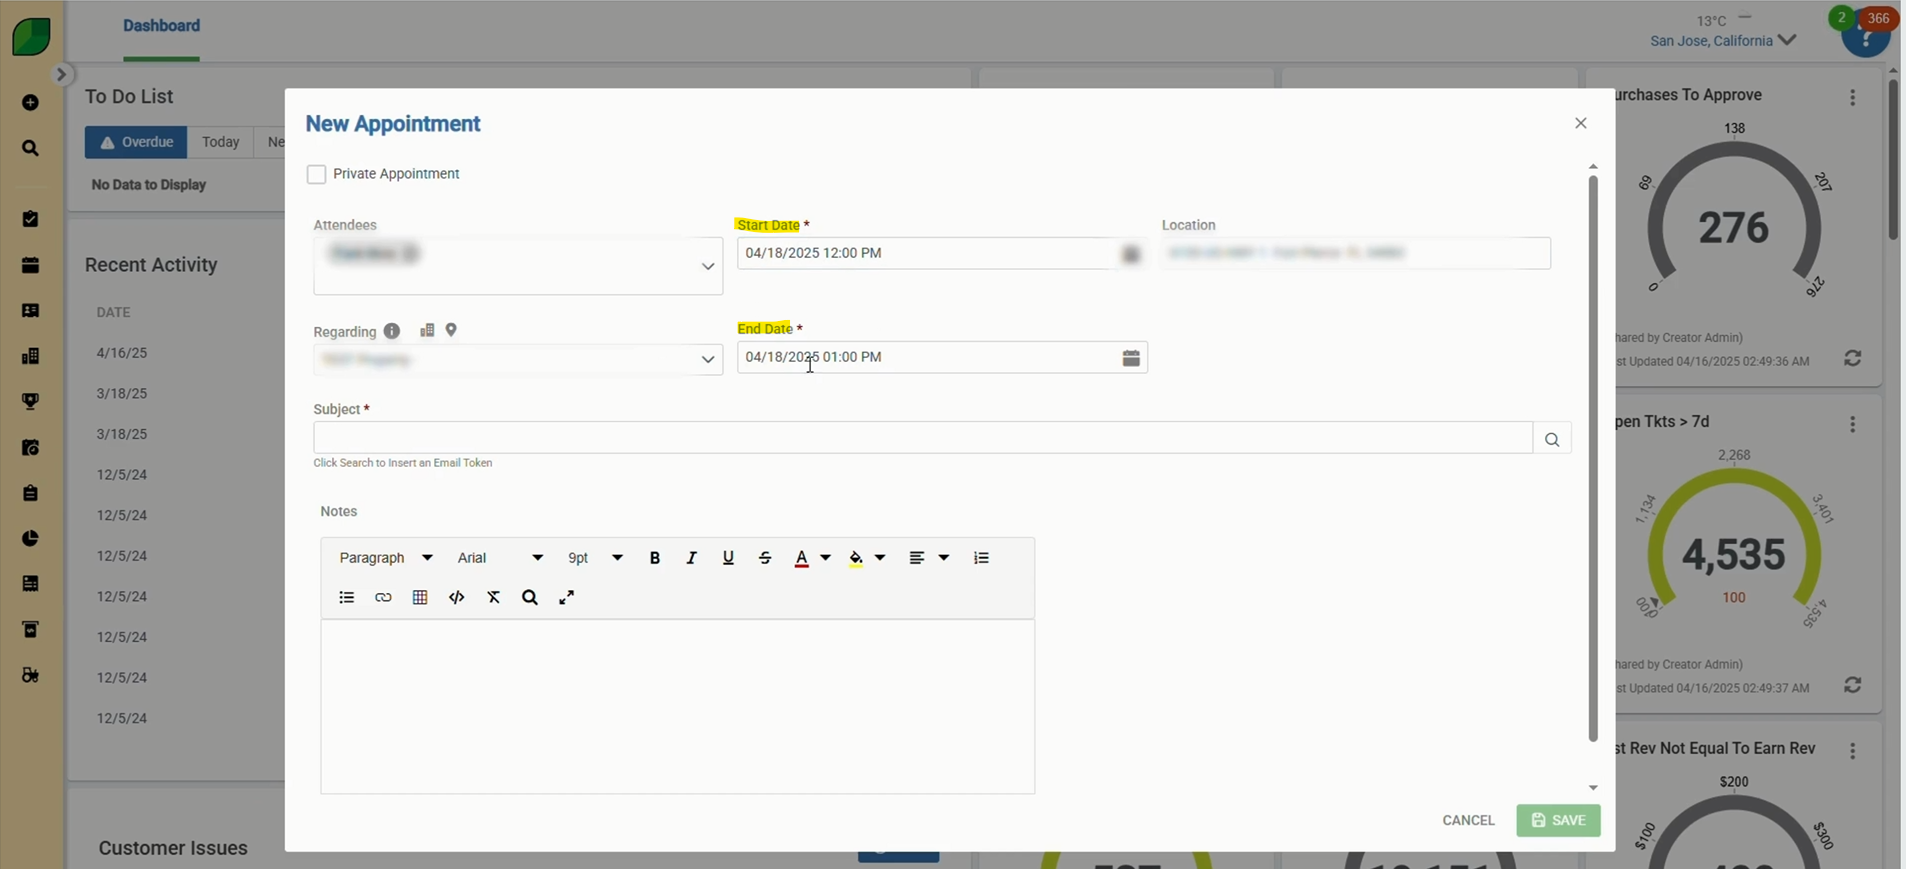
3. Enter Start and End Dates
- Set the Start Date and End Date for the appointment.
- Ensure the timeframe reflects the actual meeting or task duration.
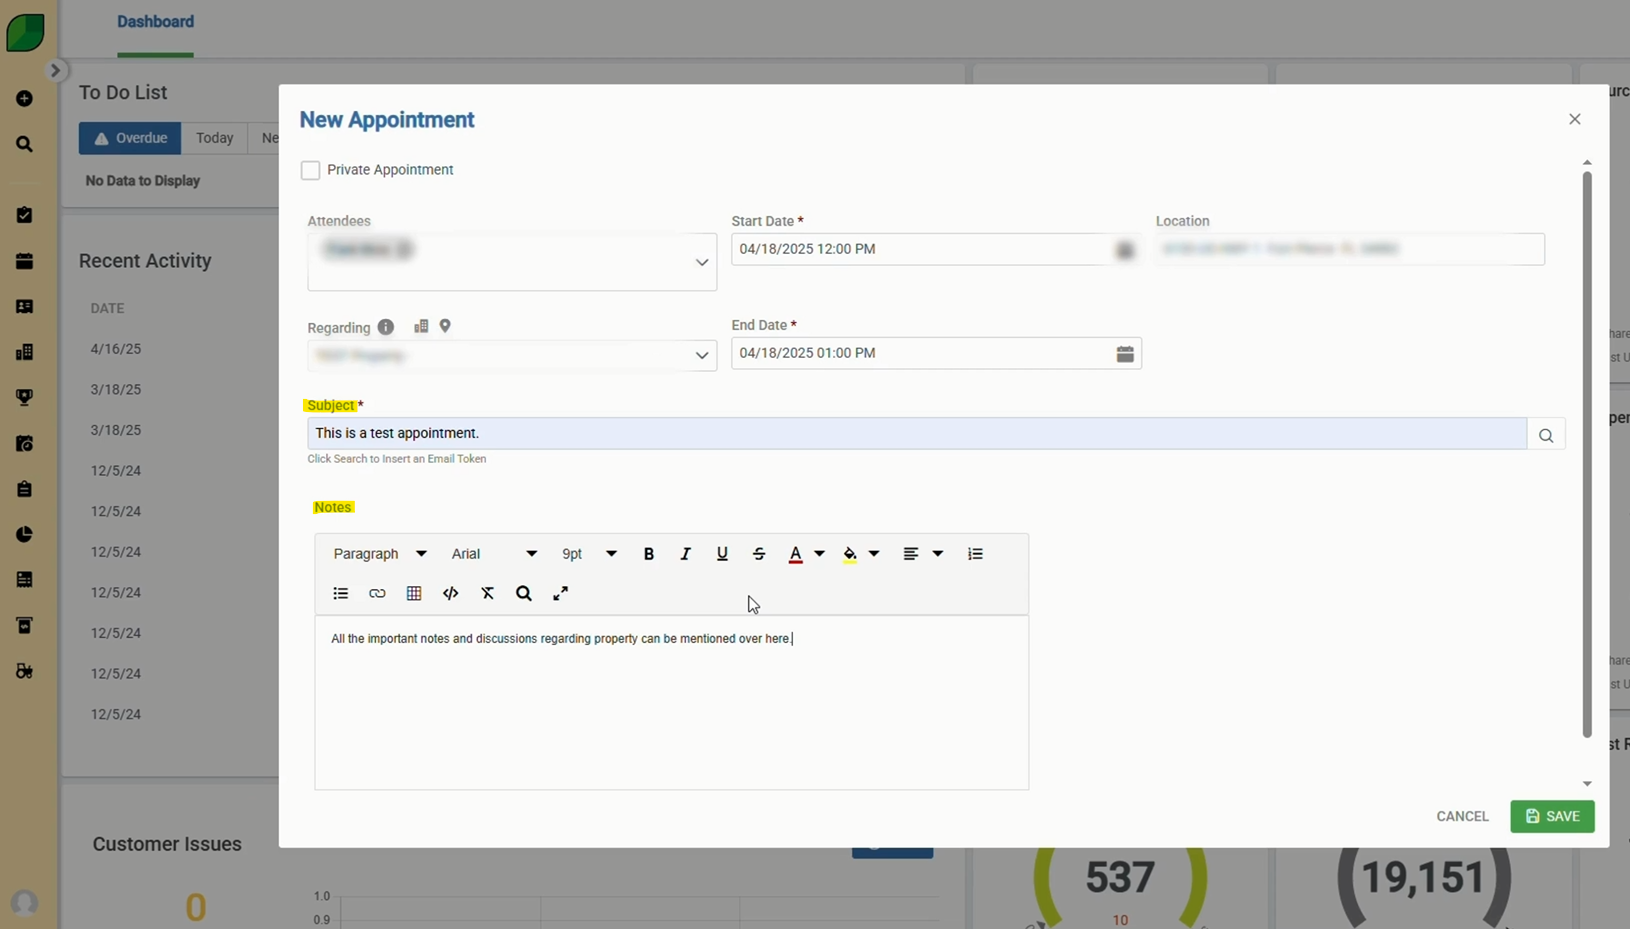
4. Enter the Subject Line and Then Write Notes
- Type a clear Subject Line summarizing the appointment.
- Use the Notes section for important details or discussion points.
5. Click on Save
- Review all filled fields.
- Click Save to finalize and schedule the appointment.
 Creating appointments in Aspire ensures proper scheduling and documentation for accounts receivable activities. Following these simple steps helps maintain clarity, improve collaboration, and keep important financial tasks on track.
Download a PDF version of the job aide here.