


Efficient deposit management is essential for maintaining accurate financial records and streamlining accounts receivable. Aspire provides a structured approach to handling deposits, allowing users to process payments seamlessly.
This job aid will guide you through the process of creating and updating deposits using the Aspire dashboard. Follow these steps to ensure accurate and organized invoicing.
Steps to Create Deposits in Aspire
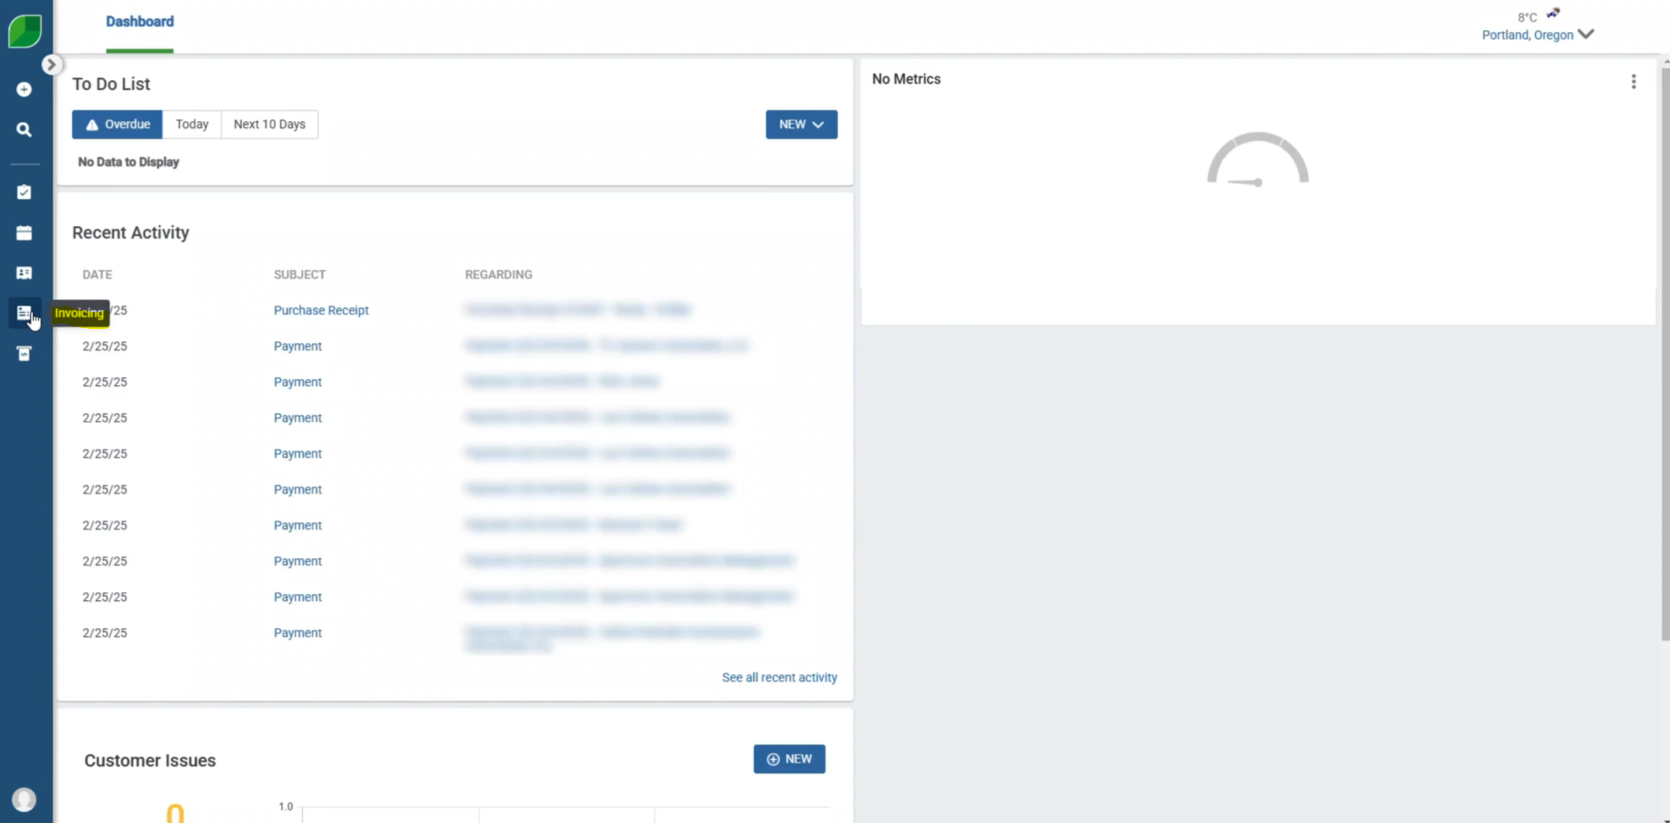
1. Go to Aspire Dashboard and Select Invoicing
- Log in to Aspire and access the main dashboard.
- On the left-hand side, find the menu and choose the invoicing section.
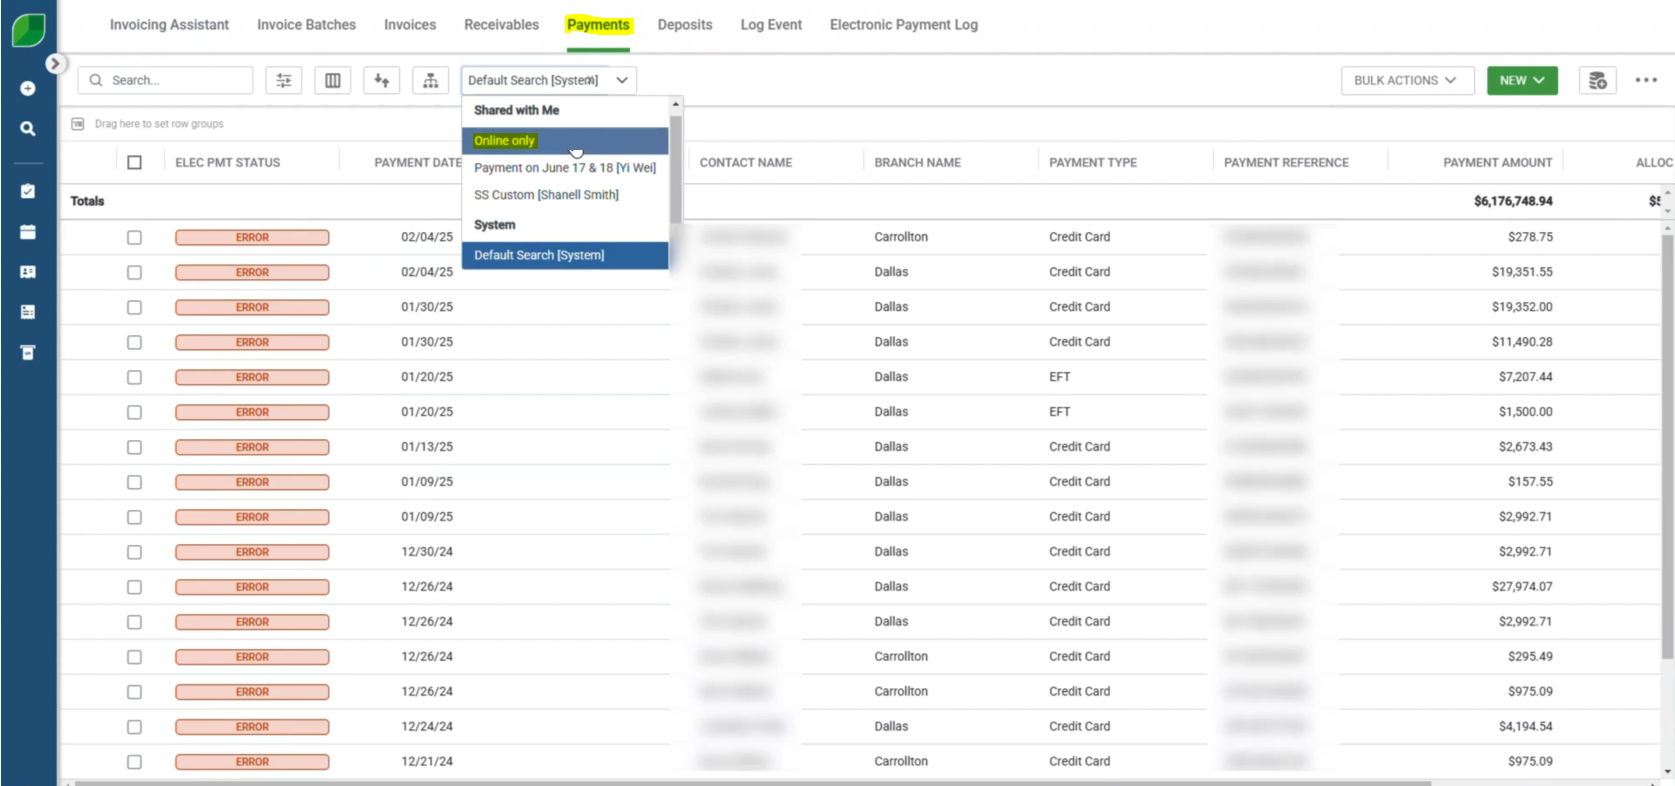
2. Click on Payments and Select Online Only from the Drop-Down
- In the invoicing section, locate and select the “Payments” option.
- In the payment options, choose “Online Only” from the drop-down menu.
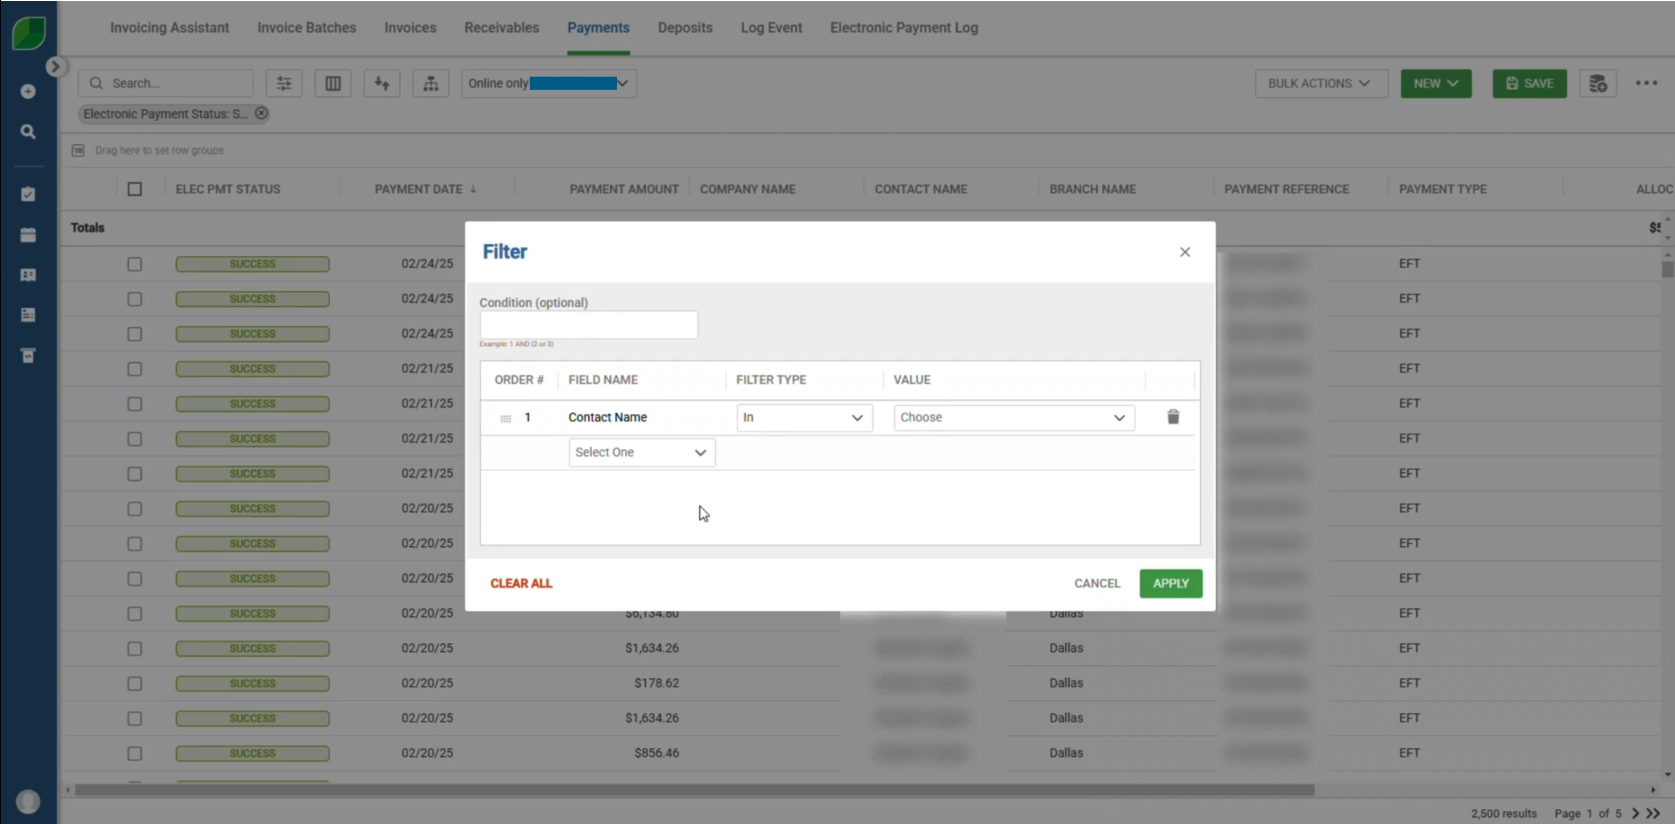
3. Select Field Name and Choose the Contact Names then Click Apply
- Use the filter option to select “Contact Name” and pick the required contacts.
- After selecting the contacts, click the “Apply” button to update the list.
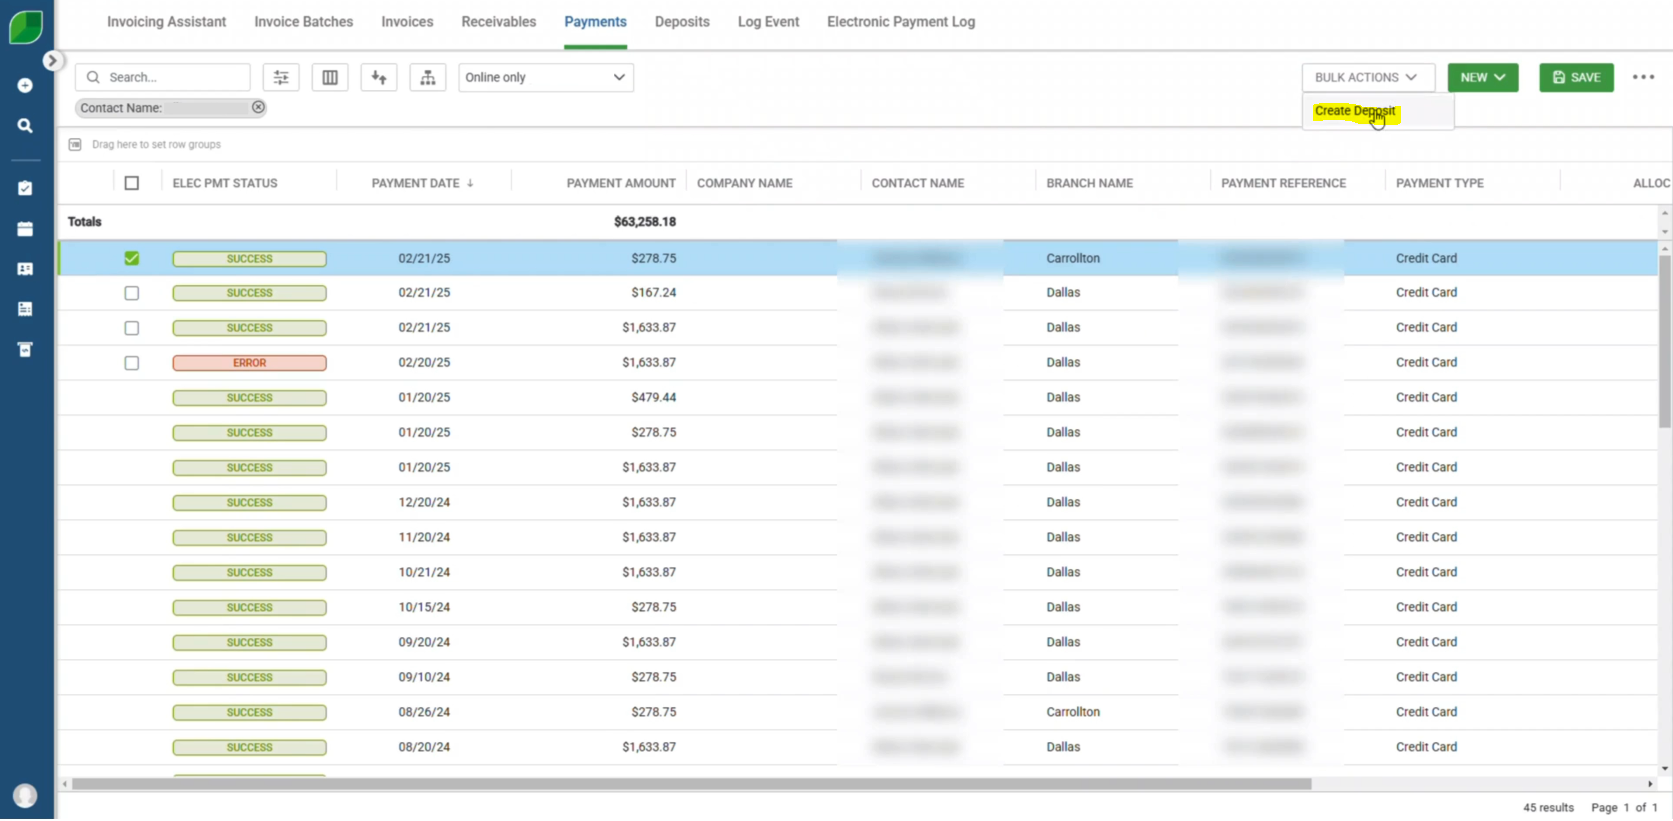
4. Select Create Deposit
- Choose a contact by ticking the checkbox, then use the drop-down menu on the right to select “Create Deposit.”
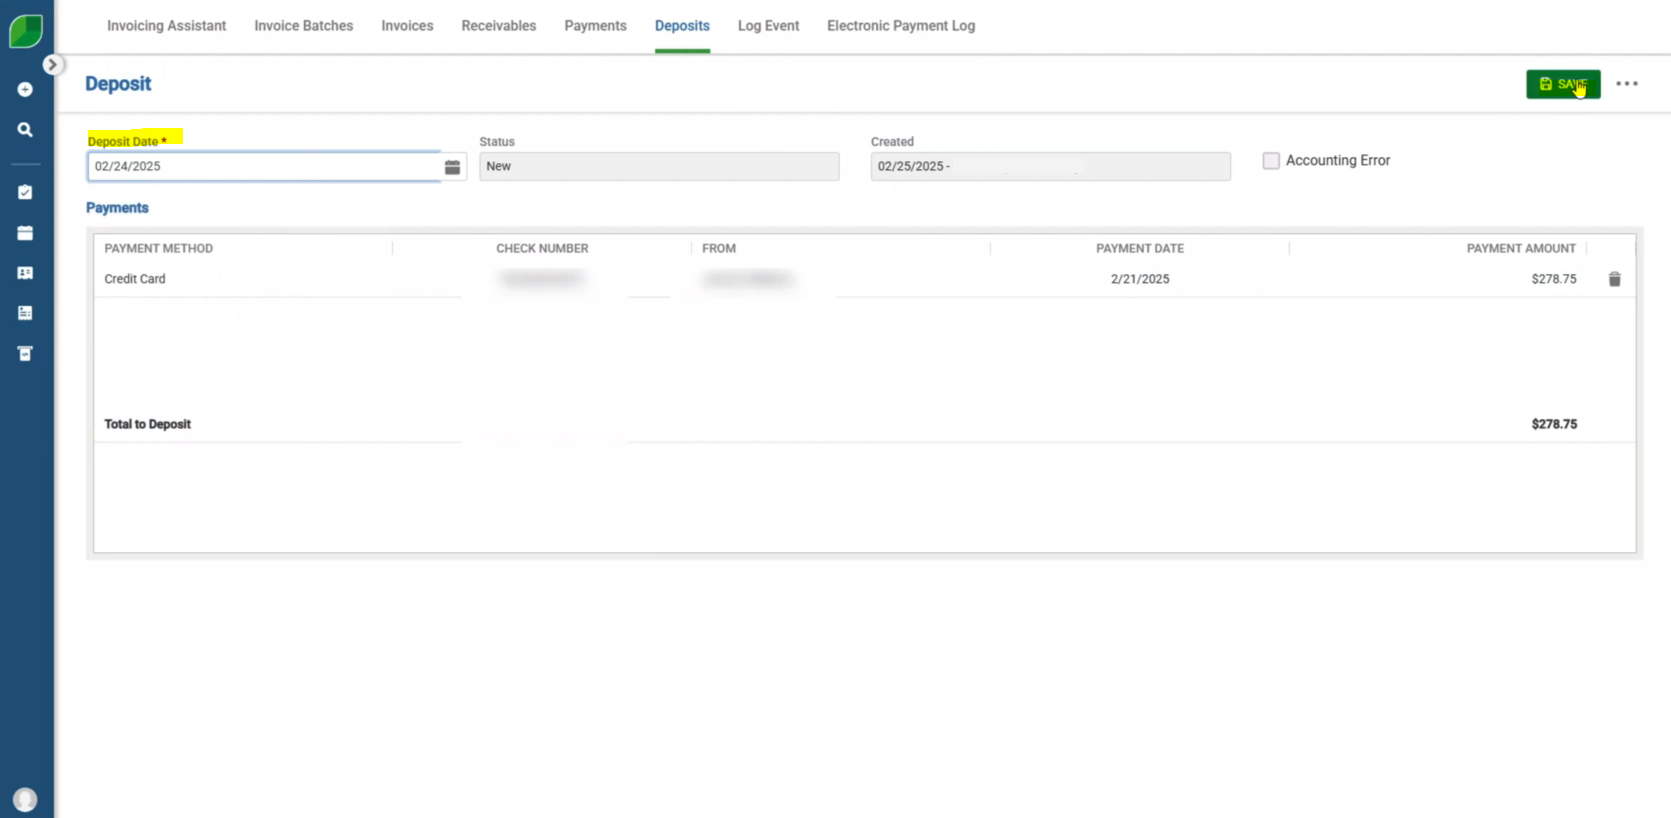
5. Enter Deposit Date, Then Click Save
- Input the deposit date in the required field and press “Save” to confirm.
6. Repeat for All Contacts You Want to Process
- Follow the same steps for all the contacts that require deposit creation.
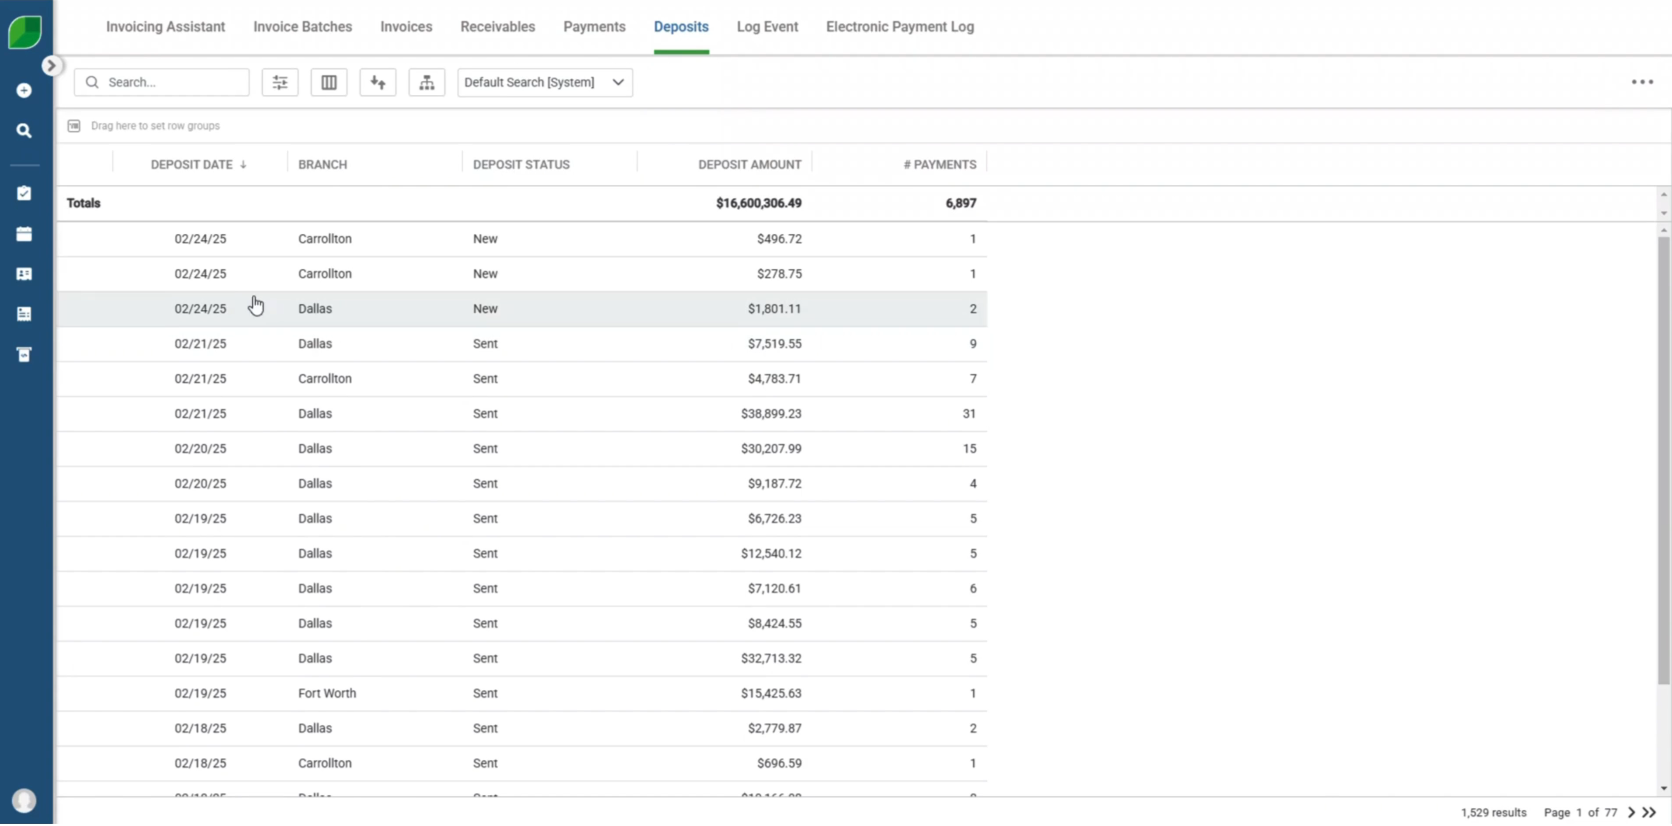
7. Switch to Deposit and Review
- Navigate to the “Deposit” section to review your updates.
- The system will now show the latest deposit entries you have made.
By following these steps, you can efficiently manage deposits in Aspire, reducing errors and maintaining accurate financial records. Regularly updating deposits ensures a smooth invoicing process and helps keep accounts receivable well-organized. Implement these best practices to enhance financial accuracy and improve overall business operations.
Download a PDF version of the job aide here.