


The Sales Commission Report in Aspire helps track commission payments based on sales performance. This report is essential for accounts receivable to determine unpaid amounts, payment dates, and commission eligibility. Follow the steps below to generate and export the report.
Steps to Generate the Sales Commission Report
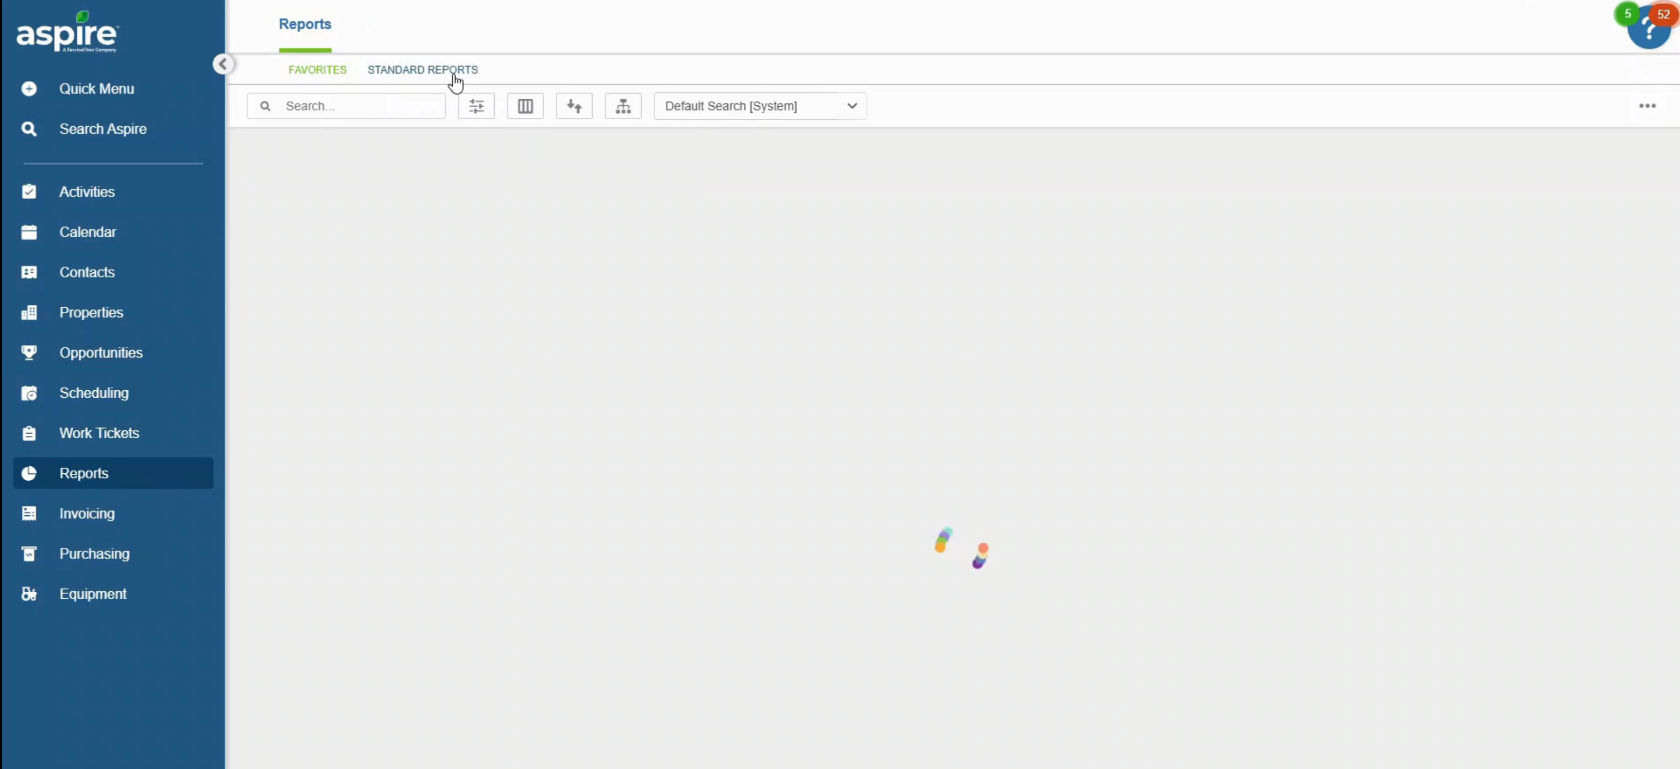
1. Login to Aspire Dashboard then Go to Reports and Select Standard Reports
- Log in to Aspire.
- Navigate to the dashboard.
- Click on the “Reports” section.
- Select “Standard Reports” from the list.
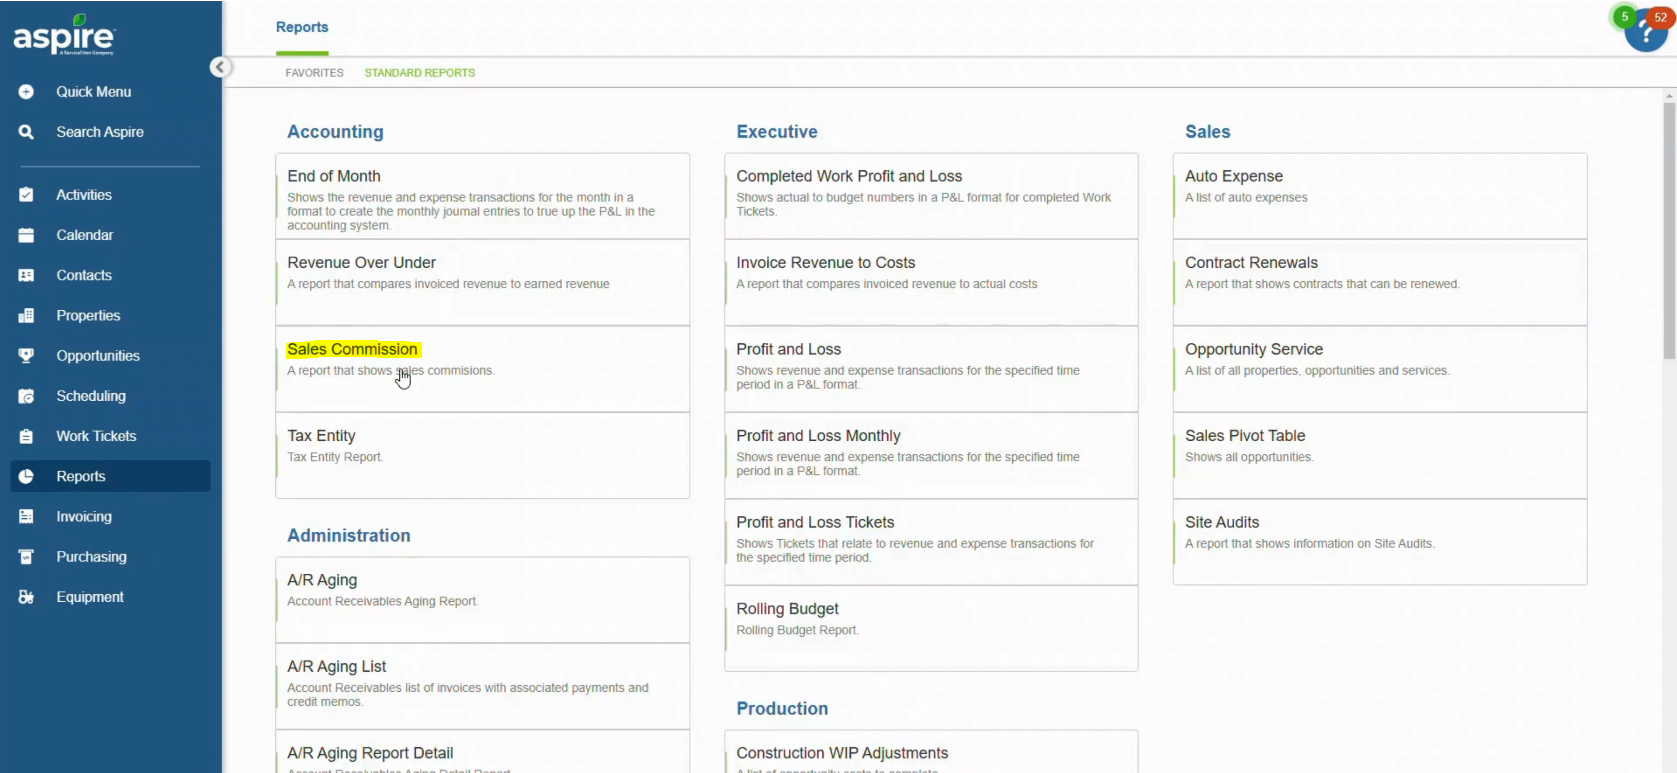
2. Click on Sales Commission
- Find and select “Sales Commission” from the available reports.
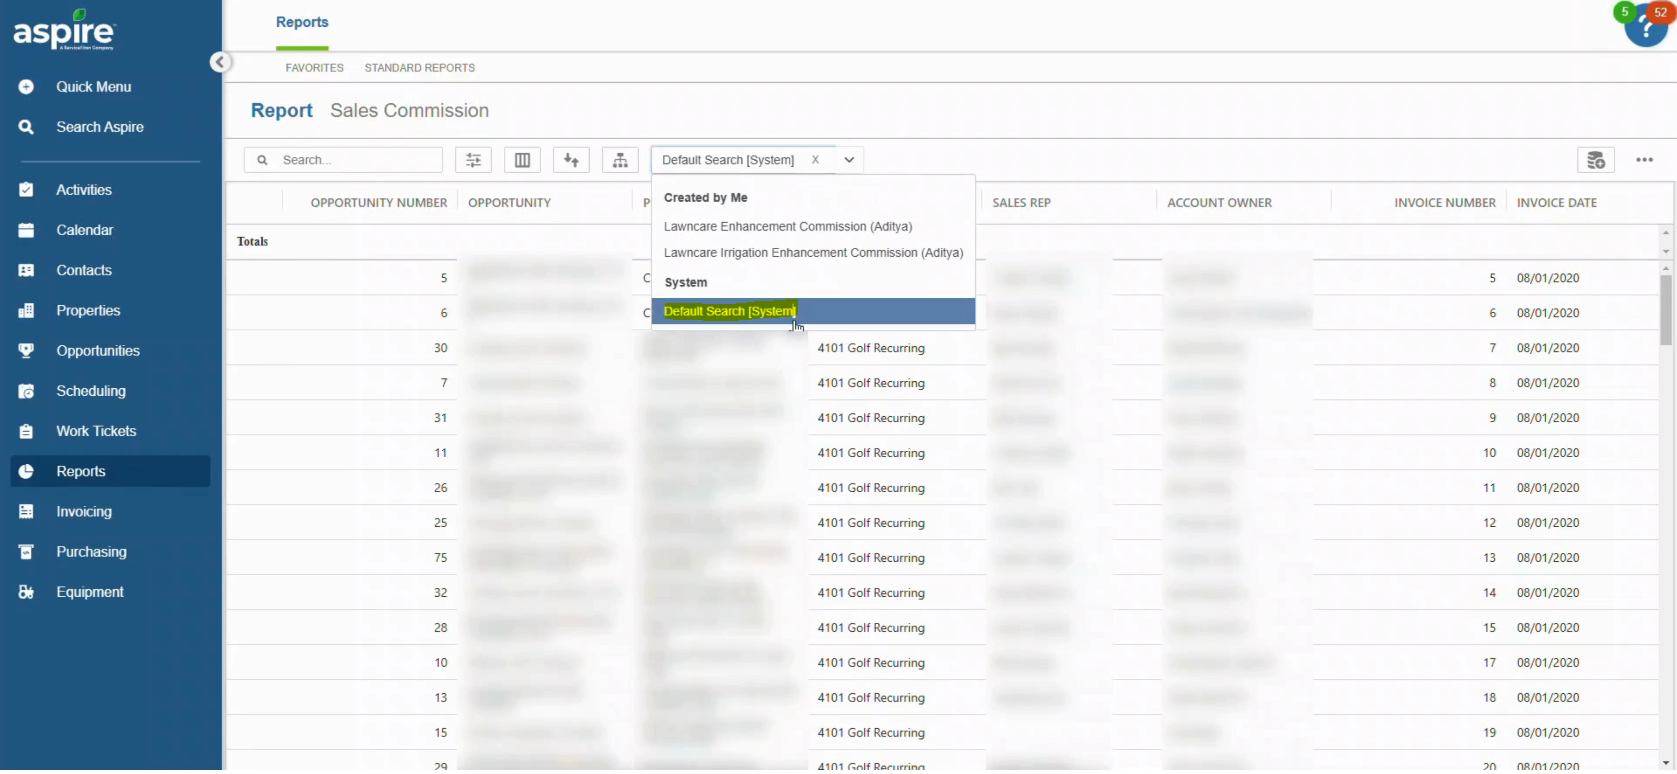
3. Sort and Select Default Search System Then Click on Filter
- Choose the “Default Search System.”
- Click on the “Filter” option.
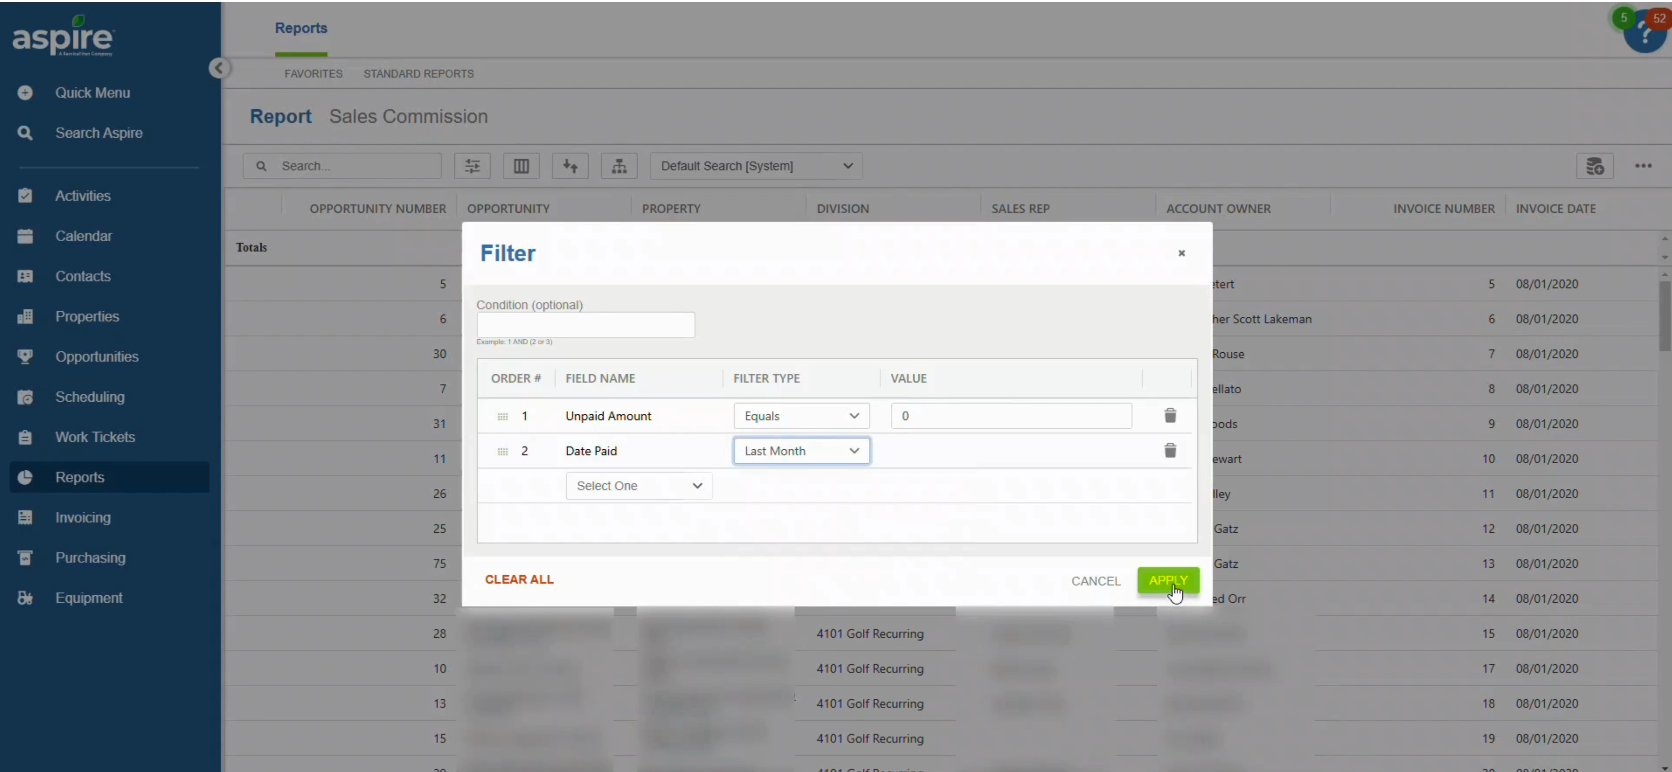
4. Enter Desired Field Name Such as Unpaid Amount And Date Paid Then Select the Duration and Click Apply
- Type in the specific field name, such as “Unpaid Amount.”
- Enter the “Date Paid.”
- Choose the required time period for the report.
- Apply the selected filters to generate the report.
5. Click on the Icon Left to Three Dots, Now Click on Three Dots
- Find the small icon located to the left of the three-dot menu and click it.
- Click on the three-dot menu for additional options.
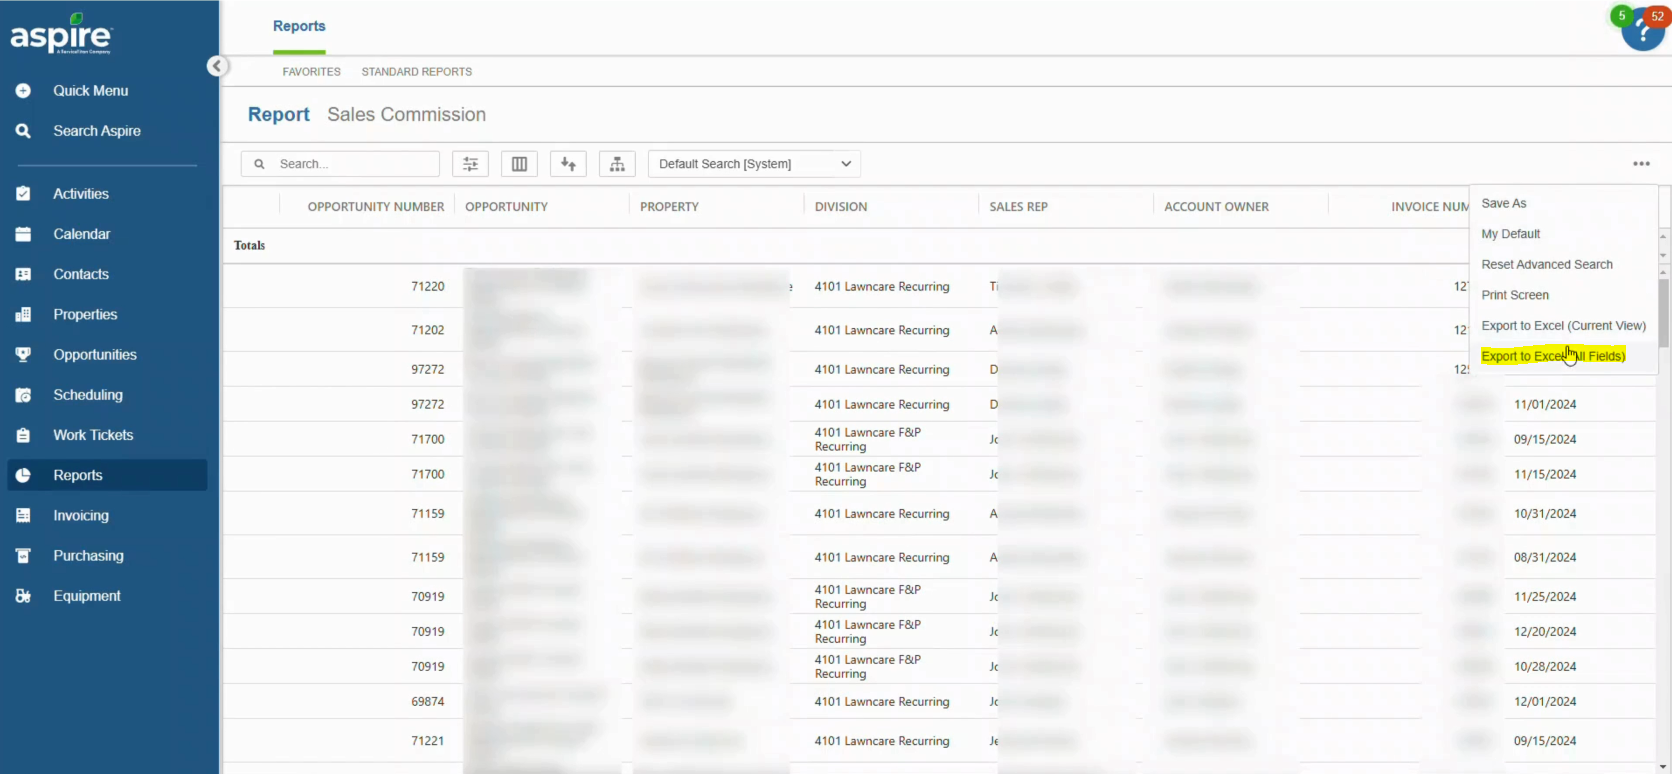
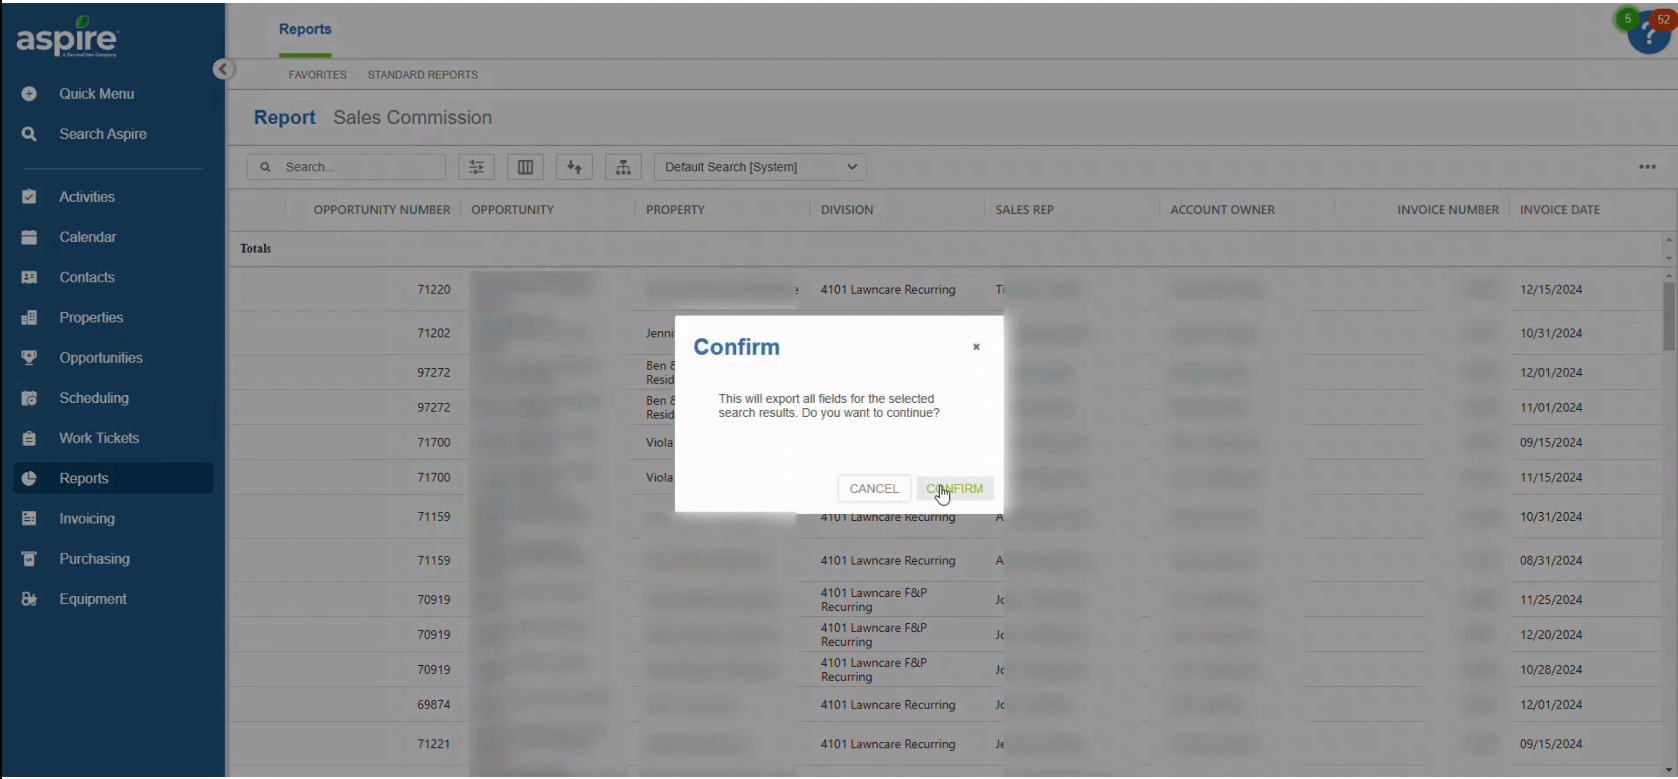
6. Select Export to Excel All Fields
- Choose “Export to Excel – All Fields” to download the complete report.
By following these steps, you can efficiently generate and export the Sales Commission Report in Aspire. This report helps in tracking commissions, verifying unpaid amounts, and ensuring accurate payouts based on company policies. Once exported, the data can be reviewed, formatted, and sent for approval before processing payroll.
Download a PDF version of the job aide here.